Introduction

The 57 acres that comprise Cedar Ridge Farm are located in the beautiful rolling hills of South Central Kentucky. My wife, our four children, and I are on a homesteading adventure as we work toward increased self-sufficiency. We grow much of our own food and enjoy being in touch with the agrarian roots of our lives.

One of the major projects we have undertaken is the building of our own home. The house we're building has three major distinguishing features: 1. we're building it without incurring any debt; 2. it is a timber frame structure; and 3. the exterior walls will be plastered straw bales. We live debt and mortgage free, and building our house with that approach makes perfect sense. Large timbers in a home possess a beauty and project a sense of strength, stability, and warmth that we want in our home. Straw bale walls provide insulation and make ecological sense. This blog is a record of our home-building project.

Friday, December 26, 2014

Beech hardwood floor in the guest room

At the beginning of December, we put down the first of the hardwood floor in our house. We worked to get one room painted and ready for the floor. We chose the guest room because it’s out of the way (not a traffic area).

Painting involves mixing our own paint (based upon a recipe I came up with after several experiments and trials). It’s basically a clay-based paint. The first coat has a lot of silica sand added to give texture to the walls. Technically, you would call this an Alis. It’s actually a thin plaster. We brush it on with paintbrushes, trying to get it even. It not only provides a nice texture for the walls, it helps cover up imperfections in the finish coat of plaster. The second coat of paint is the same recipe but without the sand added. This brushes over the first coat, brightening the walls (white) and making sure the texture is locked into place (the sand can be rubbed off the walls before the final coat).

Once we painted all of the walls and the ceiling in the guest room, we installed the hardwood floor in the room. 100_3386The wood we have is from some trees we cut and which a friend milled, planed, and tongue-and-grooved for us. It’s been sitting in the house for a couple of years waiting.

In the fall of 2013, I bought a flooring nailer. It was a good deal, although it was a refurbished unit. I never tried it out until it was time to install the floor. Well, it didn’t work right. I wouldn’t drive the nails or staples in all the way, leaving them about 1/16” above the tongue. I tried everything I could think of to get it replaced or repaired, but there was no honest way. At that point, I spent five minutes with a file modifying the base plate, and now the nailer works fine.100_3387

We spent two or three days laying the floor, and it turned out quite nice. We used American Beech in this room. Some of the logs sat waiting to be milled longer than ideal which resulted in some spalting of the wood. Spalting is wood coloration caused by fungi. If left long enough, the wood will rot, but spalting does not mean the wood is rotten. It adds additional character to the floor. Some people pay extra money for spalted wood.

100_3384After we installed the floor, I made some templates for finishing the window seat. Then, I cut the necessary curves in some Maple hardwood flooring that I bought and which is slated for the window seats/sills. I nailed these boards in place except for the last one at the outside edge. I need to rip it to the proper width, curve the two ends, and then round the top edge a little. I will also install a board along the wall underneath the outside edge board.

I’m pleased with how the floor and window seat turned out. It will be nice when we have all of the floors and window seats done.

Tuesday, September 30, 2014

We finished the final coat

At the beginning of August 2011, we put the first coat of plaster on a couple of the interior walls of the house. Well, 12 tons of dry material later, 100_2881we’ve completed plastering the interior walls!

Early in the month, I told Ramiah that we should get the plaster finished in September. Although there have been several other things to work on during the month, not just the house, we have managed to spend some time with our hands in the mud. Yesterday, we did two batches of plaster, finishing the boys room. This morning we were back at it, doing four batches of plaster and finishing the last walls before lunch time.

It feels good to reach this milestone. We celebrated this evening as a family, having some homemade kettle corn and wacky cake (a special family recipe).

100_2883

100_2882

Friday, August 22, 2014

Plaster and paint

Work on the house was delayed during much of the spring and early summer because of other demands upon my time. These were important activities, many of them involving spending time with and being a father to our children. It’s a blessing to have a plethora of things to do.

We have spent time during the last few weeks on plaster and painting. final coat of plaster on landing upstairsWe still have the upstairs walls to finish plastering and two walls in the pantry. We’ll finish those in the next few weeks. Completing the plastering before the weather turns cool is important – it needs to be warm and dry enough for it to dry properly.

We’ve also spent time painting interior walls. This is a one of those things that we want to have completed before we begin to put down the hardwood floors. The paint we’re using is some that I’ve developed a recipe for. There are several different varieties of natural paint. The one we’re using uses wheat paste as the binder.

Using a natural paint is important to me. We have natural, earthen plaster walls, and it would just be wrong to put a synthetic, latex paint on them. One of the benefits of earthen plaster is its ability to “breathe.” It naturally absorbs and releases atmospheric moisture (clay is hydrophilic), the Mud Roomand it also allows moisture in the straw in the walls to pass on through rather than get caught. Moisture in the straw would not be a good idea. With clay-based plaster, moisture that naturally gets inside the wall will be able to get out. Many people don’t realize that moisture within walls is a factor in stick-built houses, too. The inside environment, especially during the winter, is warmer and more humid than outside. Moisture in the air will naturally move toward a less moist environment. It will move through a wall. If it hits a cold, vapor-impermeable skin on the outside, it will condense within the wall. Some wall construction methods may be able to handle this condensed moisture, but straw bale is not one of them.
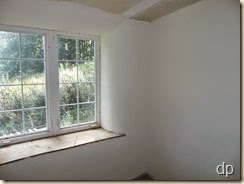
So, how does paint affect that? On the outside, it can have a greater effect if it prevents moisture from getting out the cooler side. the Laundry RoomOn the inside, it may be less of an issue. The general rule/idea is to have greater vapor-permeability on the outside of the wall than on the inside. So, maybe latex paint would be alright on the inside, but why use it on natural walls? If I go to the trouble of mixing and putting 12 tons of earthen plaster on the inside walls, why would I want to cover them with a plastic coating? It just wouldn’t be right.
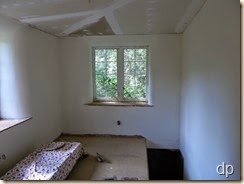
So, I’m making paint. Sure, it’s not washable, but neither are the walls. If you put enough water on them and scrub, you’re going to take off part of them, and I wouldn’t really like that! You can’t treat these walls like that; they have to be cared for. They aren’t concrete and they aren’t drywall – and I’m happy they aren’t. If you bang something into them, the Dining Room wallyou’ll likely make a divot. They are organic in composition, shape, and function. So, the paint that goes on them must also be.
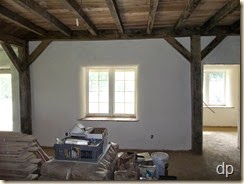
Originally, I was going to let the wall color be in the finish coat of plaster. However, that didn’t work. Instead of coming out a nice white, they end up gray when the plaster dries. Maybe there was another way to mix the plaster, different ingredients to use, or something, but I didn’t do it. Because of that, our application involves paint.

It’s been fun developing my own paint recipe. I’m not sure I want to share it, yet. I've thought of maybe selling natural paint in powder form. Just add looking down the Hallwaywater. The natural paints you can buy online seem to cost an arm and two legs. The paint I’m making doesn’t have to cost that much, and in powdered form, it’s dry, not too heavy to ship, and will keep for a long time. It’s important to use what you mix up, because if you let it sit for a couple of days, the wheat paste will begin to sour, and that’s not really pleasant.

I mix the paint with an electric mixer. I wore out two cheap ones – the plastic gears inside aren’t made to handle a lot of use. Last week I found two heavy duty ones at thrift shops for about $1 each. I put the dry, mixed ingredients in a bowl, add water, and then mix. It get beaten pretty vigorously. If more water is needed, I just add more. It can be mixed to whatever consistency, thick or thin, that I desire.

Anyway, enjoy the photos of the painting we’ve been doing. There’s still quite a bit more to do. It takes a minimum of three coats. The plaster really soaks up the first coat. When it’s fully covered, it really looks nice. I’ve mixed the paint to an off-white color. Originally, it was going to be kind of a light yellow, but I’ve adjusted it to be more white than yellow. It really brightens things up!the Great Room looking eastwardthe Great Room looking westward

Friday, February 28, 2014

I have begun building the kitchen cabinets

I’ll refrain from offering excuses for my lack of blogging during the last however many months.

Last week I began to work on the specific design of the kitchen cabinets for the house. The kitchen space is not large and doesn’t allow for standard kitchen cabinet dimensions/design, especially when factoring in the double-basin commercial sink we purchased. I also didn’t want to pay for commercially-made or specialty-made cabinets (at least not pay someone else – my neighbor says I’m cheap, but I prefer to be called frugal).

The design phase (which actually overlaps quite a bit with the construction phase, at least when I’m the one doing it) began with the dimensions of the kitchen and the locations of the windows and door. We opted for large windows in the kitchen for the light which affect upper cabinet location and size. Lower cabinets have to fit in a space delineated by the refrigerator location and the door to the summer kitchen/porch. We will have no stove in the kitchen since we cook on the wood stove we heat with (or do we heat with the stove we cook on?) during the winter and outside in the summer kitchen during the summer. The basic setup is a U-shape with a short leg on the right and the sink in the middle under the 6-foot window (which is on the longest wall straight ahead as you go into the kitchen).

cabinet framingI searched the internet for information on built-in kitchen cabinets and didn’t find much. So, I made my own plans. I spent some time with Google Sketchup in order to explore my ideas about how to make them. Then, I began the actual construction.

100_2033My construction method involves using 2x4’s to frame the toe kick (with some 3/4” plywood to raise it the level of the finished floor). I also put a 2x4 along the wall at the height of the bottom edge of the counter top. I will use some 1-1/2” cherry to construct the counter top. Then, I used maple-veneer plywood for the bottoms of the cabinets and for shelves. I used my Kreg jig to construct some internal rectangular frames using 1x’s I ripped to the desired width and cut to length. Throughout this process, I continuously checked that things were plumb and level.

I secured the rectangular frames into position with pocket screws (Kreg jig, again) and connected them to one another to frame the openings for drawers and cabinets. Later, I will construct face frames for the cabinets using 1x oak boards, and then I will make the doors and drawers.

100_2040100_2047

The design of the kitchen includes five drawers with cabinet space below them. We’ll have eight pull-out trays to better utilize the cabinet space. There was not a good way to make the space in the corners of the U easily accessible. The space can be used, just not very well.100_2057100_2059

At this point, I have most of the rough framing done for the lower cabinets. I will continue with them and then move on to the upper cabinets. They will also employ some custom design, but more on that at a later time.

Tuesday, April 30, 2013

If I don’t blog, did it really get done?

Well, the winter is over, although spring tried to drag it closer to summer. During the winter, I built a fire in the highly inefficient wood stove in the house occasionally. I would say once a week on average I would get a fire going, stuff the stove with as much wood as possible (mostly dried sycamore – not something that would burn for long, but it’s what I had), and close it down. After we stopped work on the house last fall, the indoor temperature was about 60-65 degrees. Adding only a little heat inside, the temperature bottomed out in the house at around 45 degrees. I’m looking forward to seeing what it will be like with a continuous fire when we’re living in it.

I did a few things but not much on the house over winter. Without keeping a lot more heat in there, plaster wasn’t going to dry well. And, without a more efficient stove, that was going to be problematic. Wintertime seems to have other things to commit my time to, anyway. Also, the day light period seems to be shorter for some reason.

I was able to accumulate a few things for the house (I’m still accumulating, actually). I bought interior doors. They are 3’ by 7’ solid core doors that were intended for a doctor’s office, but they had too many. I’ll have to cut them down 016to the right size and face the edges, but I think they’ll work well (they’re heavy, too). We also bought a kitchen sink. We wanted a stainless steel double sink with double drain-boards. To get what we wanted, we ended up buying a commercial sink.

In march I bought plumbing supplies for running the water lines. I decided to use PEX tubing which I had never worked with before. A friend lent me crimping tools, and I bought all the supplies locally. 015All the water supply lines are in. I still have to plumb the range boiler for the hot water (heated by the wood stove), but the lines are stubbed out for doing so. I’m actually going to plumb a similar tank on the summer kitchen with the wood stove we’ll use out there for hot water in the summer time. Because of the location for the two stoves, these will be two separate systems with valves to manually select which one to use.

After completing the water lines, I started on the drain lines in April. These are now completed, too. I still have to arrange for a septic system to be installed. We were going to just have a gray water system, but we decided to go ahead and do a full septic system. If gray water isn’t handled properly, it turns into black water. As long as we have water in the cisterns, we’ll be able to use flush toilets. If water gets low, we will use sawdust (composting) toilets.

In addition to the pressurized water system, we will also have pitcher pumps in the house. The plan is to have four: one in the kitchen, one in the mudroom, 019and one in each bathroom. I just ordered an Oasis Pump – the description of it online looks quite good for our purposes. If it meets expectations, we’ll get more.

On Friday of last week, I decided to mix up some plaster. We quit a few batches shy of having the 2nd coat done last fall. I put one batch on in the morning, and then the 3 younger children joined me in the afternoon. We put 3 more batches on the walls in the afternoon. Two more batches will finish the 2nd coat. That means, the first and second coats will amount to more than 19,000 pounds of plaster – and that’s only counting dry ingredients. 004By the time the finish coat is completed, we’ll have somewhere in the neighborhood of 12 tons of plaster on the interior walls! That should be a good thermal mass.

Yesterday and today, we mixed and applied 4 batches of finish coat. These batches are about 100 pounds of dry ingredients each, half what the batches for the other coats. These batches have gone on the walls in the master bedroom. The process involves applying the mix to the walls by hand. I then trowel it smooth. After it begins to dry, I buff it with a piece of yogurt container lid. This helps to smooth it out and close up the pores by pushing the sand into the plaster.

We’ll keep working on things. The objective is to get this house done so that we can move in. We’re getting closer.

022023

Sunday, September 9, 2012

Video: House Tour, September 7, 2012

A video tour of the house filmed on September 7, 2012, just after we finished the 2nd coat of plaster on the downstairs walls.


http://youtu.be/8zv4w0z3T6Q

Second coat of plaster downstairs is finished

We were able to get back to plastering this last week. We spent the previous week getting the cisterns hooked up. The week before that was occupied with making hay while the weather was good for doing so.

We finished all of the straw bale walls in the downstairs by Friday, September 7, 2012. It took 28 batches to do them all. That’s nearly 3 tons more plaster on the walls once it’s all dry. So far, we’re up to 9 tons of plaster on the interior walls. That total will increase by another 3 tons by the time we’re done, I expect. I think of that as great thermal mass to help moderate the interior temperature during the year – warm in winter, cool in summer.

We hope to complete the second coat upstairs within the next two weeks.

005008
