Introduction

The 57 acres that comprise Cedar Ridge Farm are located in the beautiful rolling hills of South Central Kentucky. My wife, our four children, and I are on a homesteading adventure as we work toward increased self-sufficiency. We grow much of our own food and enjoy being in touch with the agrarian roots of our lives.

One of the major projects we have undertaken is the building of our own home. The house we're building has three major distinguishing features: 1. we're building it without incurring any debt; 2. it is a timber frame structure; and 3. the exterior walls will be plastered straw bales. We live debt and mortgage free, and building our house with that approach makes perfect sense. Large timbers in a home possess a beauty and project a sense of strength, stability, and warmth that we want in our home. Straw bale walls provide insulation and make ecological sense. This blog is a record of our home-building project.

Wednesday, September 21, 2011

Building the chimney (part 1)

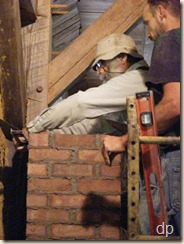
013Yesterday, a good friend came over to help me begin building the chimney for the house. Previously, I poured a footer and built a block foundation for it, but I hadn’t started on the actual chimney yet. Although I’ve read a little about how to lay brick, I wasn’t quite sure about tackling the project by myself. So, I asked David if he would help since he has laid brick on many different jobs in the past. He was glad to assist.

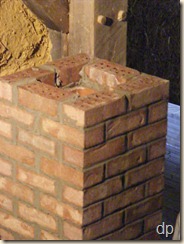
David showed me the basic technique, which for this job is not too difficult. I’ve laid a few concrete 003blocks with mortar in the past, and this brick work was easier, as far as I’m concerned. The biggest concern is keeping things level and plumb as it goes up. We used levels to check things on each course. My biggest concern is going straight up to the hole I have cut in the ceiling through which the chimney is supposed to go. We seem to be on line for that.
We put a clean out access door near the floor. I’m not sure how the door I bought for this purpose was intended to be attached, but we figured out how to get the job done.

The thimble for the stove pipe coming from the stove will be just above the narrow window which is on the wall that will be behind the stove. 014By the time we finished yesterday, we were at that level which is about seven feet off of the floor, having set the flue liner with the hole for the thimble.
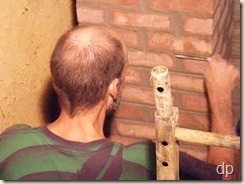
I’ll finish the chimney during the next couple of weeks, depending on the weather. It’s been kind of wet here for a few days which isn’t good for laying brick outside. I’ll need to push it through the roof next,028 so I will be working on the outside. It’ll be interesting laying the bricks as the chimney goes through the ceiling and roof area, but I’ll manage.
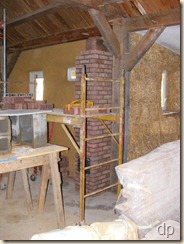
I’m happy with how it’s looking. I bought these bricks mainly because the brick place was selling them at clearance price, trying to sell their remaining stock. I ended up buying them for less than 15 cents apiece (less than half price). However, seeing them as they become a chimney, I like how they look really well. It’s going to be a nice looking chimney.
More slip straw

As I’m able, I continue to work on the house. There are many different projects to keep me busy, of course. As things come together, even though there is a lot yet to do, I am beginning to see the light at the end of the tunnel. We will get it done and be able to move in sometime.

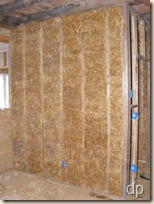
On the first day this week, three families came over to help pack straw in some of the interior walls. We really appreciate their willingness to help. We all enjoy spending time together.

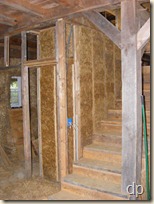
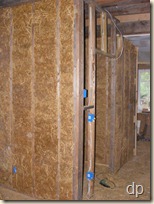
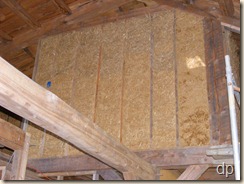
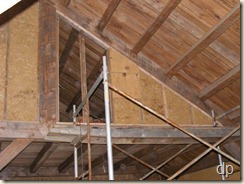
There are still several walls to be packed before they’re all done, but we made some good progress. We packed the wall behind the stairs, the wall on the kitchen side of the pantry, part of one wall in the hallway, and half of another wall in Robert’s room.

One of the most time consuming aspects of slip straw is moving the forms, but there’s no way around that. It’s actually a fairly simple process, and it makes a nice product.

022023026

Saturday, September 3, 2011

Ceilings

As I took lumber that’s been stacked in the barn for the last five years to have it milled into flooring and began to see how much (or little) I actually had, I began to think about one of my plans. I’ve been planning on putting up a wood ceiling in the kitchen, mudroom, laundry room, and Robert’s room (the room that was going to be the sewing room/study but which we redesigned to be a guest room – Robert is a friend for whom it is currently intended). But, as I saw my supply of wood diminish, and knowing that I have need for more dry 036boards for base board, moldings, cabinets, doors, etc., I felt a need to explore other options.

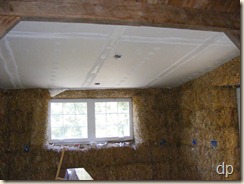
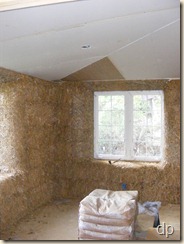
I finally decided to put up drywall ceilings in these areas. I will paint them with the same clay paint that I will make for the other walls. 042It should make these areas brighter than they would’ve been otherwise, and it preserves my other wood pile near the garage for some of the other needs I anticipate.

So, earlier this week, I brought home enough drywall for the ceilings that needed done. I also bought some moisture resistant green board drywall and insulation for completing the 040root cellar.

I spent time this week putting up ceilings and was able to get them all up by yesterday afternoon. I also had time to begin taping and mudding seams in the kitchen before it was time to quit yesterday. As I like to have it happen, the only waste from the sheets of drywall I bought were small pieces and one piece about 3 feet by 4 feet.

Getting muddy again: plaster and slip straw

There are many different projects to work on in the house. I have the luxury of focusing on just one thing or working on several at any particular time. Sometimes, diversity is nice. It’s also nice to get a particular project or focus completed.

When I got the bags of clay for the finish plaster moved into the house, I mixed up a small batch to put on a wall in order to see how it will look. Because it is powdered clay, it feels very different from the material we’ve been working with that we dug out of the ground. It’s fluffy. I mixed the small batch in a bucket and applied it with a trowel on the living room wall which I had previously plastered (the slip straw wall).

I screened the sand through a window screen to remove the larger grains/small rocks. 014I mixed it at roughly two parts sand to one part clay. When wet, the plaster is gray in color. As it started to dry, I buffed it with a plastic lid cut out of a yogurt container. This helps to push the grains of sand into the plaster and make it smoother.

It turned out well. Once it dried, it was no longer gray but, rather, white, like it was supposed to be. It was a thin layer of plaster, and I didn’t get it all applied as evenly as I would like. There are areas with a different texture because I wet the trowel to try to help spread it a little more in places. These areas have a different feel and look than the other areas. That’s okay. This was a test patch to learn from. I’m thinking I’ll make an alis (a clay paint) to go over all of the walls when done. The alis will have wheat/flour paste as one of the ingredients to help 006give it a non-dusting texture. It doesn’t dust badly without it, but you can rub of clay if you try.

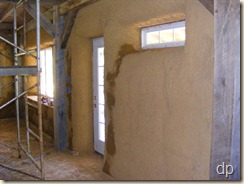
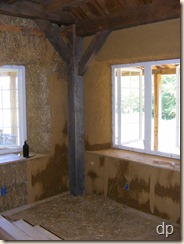
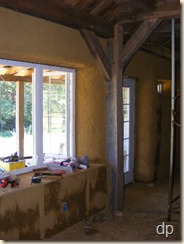
Last week, I felt like playing in the mud some more. So, I mixed and applied three batches of plaster to the bales on the front wall of the house, from where I left off on the wall that will be behind the wood stove to the corner of the living room. This coat uses a high clay content plaster and has to be worked into the bales. It’s applied by hand and actually feels good. It was neat to work the plaster around the curves near and above the windows and begin to see the look of plastered straw bale walls in the house.

002004You can see the plastering job in these photos. When they were taken, the plaster wasn’t completely dry yet. That’s why there are dark areas. I’m looking forward to applying the second coat which will begin to smooth out the walls and fill in the depressions and irregularities that are evident with the first coat. One of the things I did before I started to plaster was to nail a 1x2.5 inch board at the base of the wall. The plaster will come out flush with the board near the floor. 008Then, once the finished floor is installed, I will have a surface to nail base board to.

Earlier this week, the boys and I packed some slip straw in the girls room which is upstairs on the east end of the house. Earlier this summer, we had packed most of the walls in this room, but there were a few places that we didn’t get done and hadn’t finished yet. One of the things I’ve learned about slip straw is that the thicker the clay slip mixture, the stronger the wall. Previously, we’ve used some slip that would’ve made better walls if it had been thicker (more clay in it). They are all okay, I think, but the areas we packed using more 028clay in the slip are more dense and tight. I think I ought to do a video on slip straw…

We packed the closet walls which are on either side of the window on the north side of the room. I’ve imagined this window having a dormer-like feel because of how the walls will be, and it does. The closets also seem quite nice. They’re about 3.5 feet wide, and each upstairs bedroom will have two.

046While I was working on another project later in the week, Ramiah decided to pack some on the storage room wall on the east side upstairs above the living room. He mixed the slip and straw, put the forms on, packed, and moved the forms all on his own. I think he did a great job and am very proud of him.

Material accumulation

One of the things I’ve been doing recently is accumulating material for tasks to be completed on the house. Earlier this spring, I hauled some boards to a friend for him to plane them and tongue-and-groove them. These boards will become the finished floor in the house. A couple of weeks ago 015I took the rest of the boards to him and picked up the first half which he had gotten done. They’re now stacked inside the house awaiting the time when we’ll be ready to put them down. I’m sure I’ll have to move them a time or two as dictated by other jobs in the house before we actually begin installing the floor.

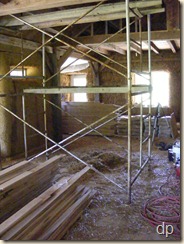
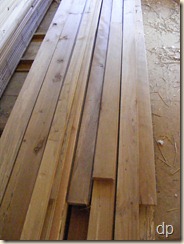
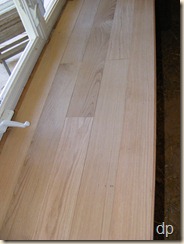
The flooring is oak and beech. The beech has a lot of character, including some spalting, in it. The oak overall is nice. The second set of boards to be done appeared to be of better quality than the first set. I also purchased about 300 square feet of maple flooring from a family that had some left over when they had new floor installed in their house. You can see the stacks of flooring in the photo to the left. The oak is in the living room and the other is in the kitchen/dining area.

Another item now residing inside the house is 20 bags of number 6 tile kaolin clay to be used for the finished plaster on the interior walls. You can see some of the bags stacked near the flooring in the kitchen/dining area in the photo above. I wasn’t sure how much I would actually need, so I ordered 2,000 pounds of it. I figured it was better to have too much than too little. I ordered the clay from Kentucky Mudworks which is located in Lexington. They have a special deal for in-state shipping. I met the truck in town to get the pallet loaded with the 20 50 pound bags of clay.

Several weeks ago I also bought bricks, mortar, and clay liner for building the chimney. I have yet to construct the chimney, though. The brick and flue liner are still on the trailer which is parked near the house. The bags of mortar are stored on the porch where they will not get wet.

I also have paint for painting the house. I needed to get some for painting the fascia boards before gutters are installed. So, I purchased enough to paint the whole house when we can.

017020

(Examples of the flooring: beech in left photo, oak in right.)

Tanks for the water: part two

035

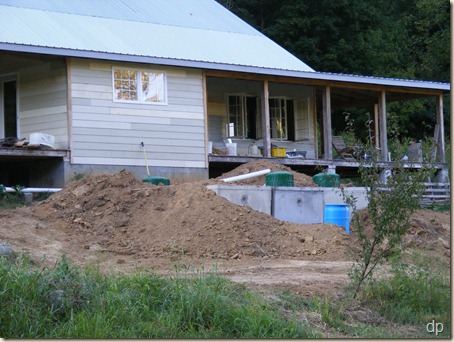
Although the cisterns are not collecting rain water, they are mostly ready to do so. We don’t have gutters on the house, yet – I’m waiting on the installers. Based on the bid I received for seamless gutters, it’s actually cheaper for me to let them install them than to buy and put up gutters myself. So, as soon as they schedule their crew to come do the job, we’ll have the house guttered. In the photo, you can see that I painted the fascia. This is the color that the whole house will be painted eventually.

I’ll detail later the construction of roof washers and screen filter that I’ll construct. The roof washers will divert the first several gallons of water coming off of the roof whenever it rains. The intention is to let the first bit of rain wash dirt and debris off of the roof so that it won’t end up in the cistern. The water will run through a screen before entering the cistern in order to keep leaves and things that get past the roof washers from being in the harvested water. The water should be clean enough for general household use, bathing, washing dishes, and laundry. All cooking and drinking water will be run through a ceramic filter first.

After we had the three tanks set in place, I rented a drill with a 3” concrete bore bit. With my dad’s help, I drilled a hole about two and half inches off of the bottom of each tank. The septic tanks are only set up with inlets and outlets near the top of the end walls. With the holes lower, I was able to connect the tanks to one another so that they will fill and empty as one tank rather than three individual tanks.

The three inch hole was a little over 1/2 inch larger than the exterior diameter of 2 inch PVC. So, I used some 1/4 inch Plexiglas and silicone caulk to seal these outlets. I used an 8 inch piece of 2 inch PVC (actually electrical conduit, but it’s the same thing as used for water, only a different color) threaded on both ends. The threaded fittings on each end tightened against the Plexiglas and sealed the holes around the pipe.

When I plumbed the tanks together, I put in ball valves on each tank so that I can isolate each tank separately for cleaning whenever deemed necessary in the future. I also plumbed in a drain line. I put all of these valves next to one another so that I will be able to access them easily. The tanks are in the hillside in front of the house, and there will be dirt completely covering them. On the down hill side, I will terrace the slope with beds for flowers or whatever so that it won’t be too steep. In one of the terraces I will have an access to the valves, about 36” deep inside a plastic barrel I cut the ends out of for this purpose.

I took the two inch line from the tank outlets and ran it into the crawl space of the house. I also teed off of it for a 3/4 inch line which I also ran into the house. The 3/4 inch line will supply the water to the pressure pump and the 2 inch line will be for installing a pitcher pump in the house and to provide the opportunity for additional pitcher pumps later on if necessary.

Since I was concerned that if we received a heavy rain during which water might flow into the cisterns faster than the 2 inch line connecting them together could keep up with (leading the first tank to reach full and need to overflow before the other two tanks), I connected the tanks together with 4 inch pipes at the level of the inlets on the side near the house. This ties the tanks together at that level and then serves as the overflow which will be run to the pond.

I used my loader tractor to push dirt around and onto the cisterns once I had them plumbed together. I still have to manually move some of the dirt since I don’t want to take the tractor on top of the tanks. In order to get them covered properly, I’m going to need some more dirt, which I have on the east side of the house. I’ll have to relocate a few things that are in the way before I can begin to move that dirt in order to finalize the landscaping around the cistern and generally in front of the house.

After more research, I decided not to put a coating on the inside of the tanks. It could potentially lead to more problems than plain concrete would. I cleaned the interior walls as well as I could, and I think they’re ready for water.