Introduction

The 57 acres that comprise Cedar Ridge Farm are located in the beautiful rolling hills of South Central Kentucky. My wife, our four children, and I are on a homesteading adventure as we work toward increased self-sufficiency. We grow much of our own food and enjoy being in touch with the agrarian roots of our lives.

One of the major projects we have undertaken is the building of our own home. The house we're building has three major distinguishing features: 1. we're building it without incurring any debt; 2. it is a timber frame structure; and 3. the exterior walls will be plastered straw bales. We live debt and mortgage free, and building our house with that approach makes perfect sense. Large timbers in a home possess a beauty and project a sense of strength, stability, and warmth that we want in our home. Straw bale walls provide insulation and make ecological sense. This blog is a record of our home-building project.

Thursday, September 23, 2010

Another bale wall and a video

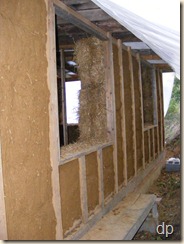
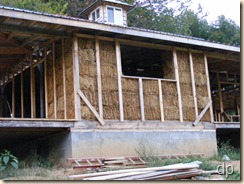
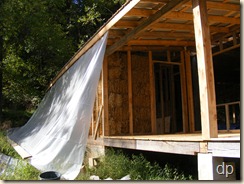
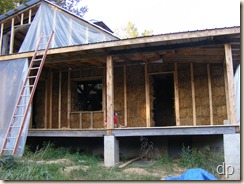
new wall viewed from the porchexterior view

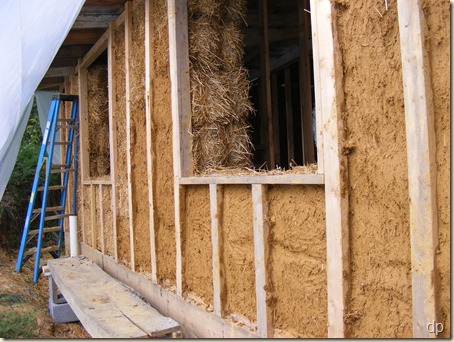
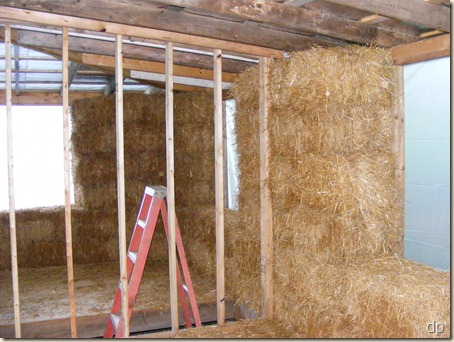
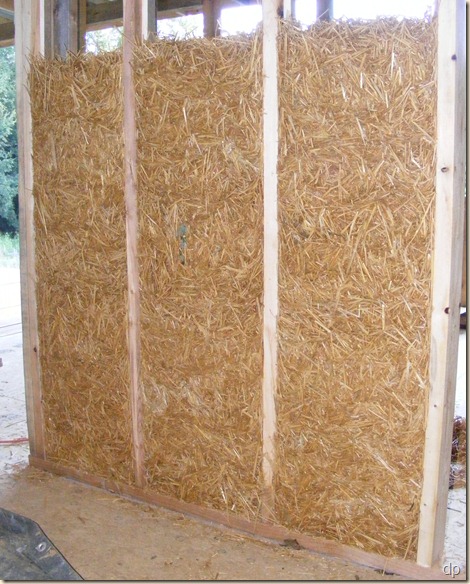
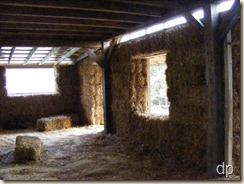
On Tuesday, I added some more bales to the kitchen walls and pinned two of the kitchen walls. I had to make some custom bales to fit at the top of the wall along the roof line.

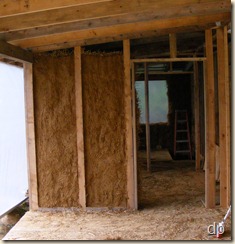
On Wednesday, I decided to stack the wall between the mudroom and the kitchen. I needed to put the bales up above the mudroom doorway and the kitchen doorway, and I needed the rest of the wall constructed before I could do that.

The boys helped me put some plastic on the outside of the upstairs on the west side. This is so that rain cannot blow in from above and soak the bales in the downstairs wall.

As I was getting started stacking, Anne came down to the house to be my helper. Since new wall stackedthere was a lot of retying on this section of wall, there wasn’t a whole lot she could do in its construction. So, she worked filling voids on the two kitchen walls that were already pinned (the voids stuff easier once the wall is pinned into place). The boys also helped filling voids with loose straw. Anne did help me put a few bales in the wall I was constructing.
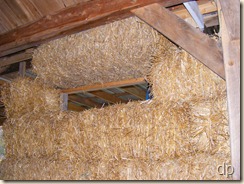
Over the doors and the window, I was going to use chicken wire to suspend the bales. board supporting bale above windowOver the two doors, there was going to be a bit of a problem attaching the wire, though. I decided to not use the wire, instead opting for a board to support the bales.
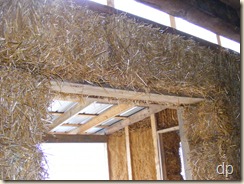
I used extra porch floor boards (rough cut beech) cut long enough so that they extend beyond the openings on each side a foot or two at least. Above the doors, these boards should be sufficiently able to hold the weight of the one bale. The window opening is wider. So, even though only one course of bales is being supported, I will brace the board in the middle to the frame work which is above (the shelf upon which the upstairs bales will sit). The boards are set back from the inside edge of the wall enough that I will be able to round the edge a little before plastering. The boards will not be visible – they will be plastered over.

I was happy with the wall. The top course of bales needed to be persuaded in order to fit it under the bale shelf. This is good. It helps keep the wall tight. If a bale is hard to get into place, a piece of cardboard put under it helps it to slide over the lower bale more easily. I’ve also found that the large mallet (persuader) I built for putting the timber frame together works well for knocking bales into place.

A friend lent me an interior scaffold. This is a great thing! It really helped when beating the top course bales into the wall. He’s also lending me two sets of exterior scaffolding which will be invaluable.

I video taped a brief tour of the house showing a few of the things we’ve done recently. I’ve shared photos of all this, but sometimes it’s nice to see it in a video.
Monday, September 20, 2010

More plaster & more bales

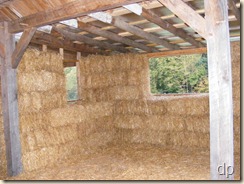
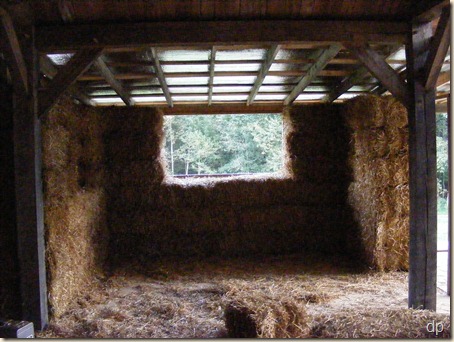
looking into the kitchen

Last week, we stacked the first fifty feet of straw bale wall and started the first coat of plaster. Dad and I finished the first coat of plaster on the west side by the end of the week. Today, Jon and I plastered the north side.

Our plaster recipe is five gallons of clay dirt which has been screened through 1/2” and then 1/4” hardware cloth, five gallons of sand, two gallons of chopped straw, one quart of homemade wheat paste, and about 3 gallons of water. We mix it in my electric concrete mixer. It mixes into the consistency of a chocolate mousse.

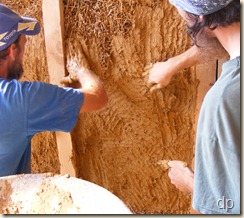
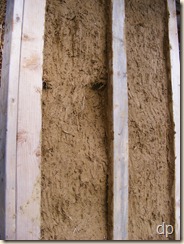
The plaster is spread on the bales by hand. We are really working it into the bales, making sure it is well keyed in. The goal at this point is a thin covering of plaster that will adhere well while revealing the topography of the bales. It takes a bit of time to work it in this way, plaster on north sidebut I want to be sure it is a good base for the next coat, one that will not come off.

We finished the first coat on the north wall by lunch time. So, after lunch we started stacking some more bales. Our approach is to build the walls in sections. Most of the walls will have to be protected from the elements until they are well plastered. So, I don’t want them all erected at once.

Our second bale wall section begins at the door from the kitchen to the summer kitchen and ends at the front door. I debated about whether or not to dip the bales in clay slip this time. It adds an additional couple of steps and slows down the stacking of the bales. We found little advantage to our dipping efforts the last time.

The idea with dipping is to have a coating of clay on the bales for the discovery coat to adhere to. We didn’t end up with that much clay on the bales, at least not enough to help with the plastering except in one or two spots. Also, trimming the face of the bales with a weedeater string trimmer makes a nicer surface for plastering than not trimming then, but it also knocks off a fair bit of the clay from the slip.

So, I decided that we will just continue working the first coat of plaster well into the bales and not worry about dipping them in clay slip. We’ll spend the extra time required in plastering rather than spend extra time in mixing clay slip and dipping bales before stacking them.

Stacking the bales around the kitchen and to the front door meant that we built a section of wall against the timber frame in one area. bale hung above window openingThere is a window opening framed in this section for a 1 foot tall by 4 feet wide window on the wall behind the wood stove. This gave me an opportunity to experience hanging bales above a window. My idea was to round the bottom inside edge of the bale and then hang it above the window with chicken wire (poultry netting). The concept worked, as you can see in the photo to the right. There are still a couple bales to be added  to the wall on either side. I’ll have several more windows above which to hang bales as we progress.

I’ll pin the bales tomorrow, trim their faces, and fill voids, if all goes well. I’d like to start plastering the outside of this wall section on Wednesday.

Thursday, September 16, 2010

Plaster: the beginning

Plastered straw balesYesterday’s work went very well. Dad, Jon, and I began by tying external pins to the rest of the straw bale wall. With three people, this job went a lot faster than the previous day. Again, pinning the walls really strengthened them by locking the bales together as a single unit rather than individual pieces stacked up.

After finishing the job of pinning, we stuffed voids with loose straw. There were places between bales where you could pretty much reach through the wall. This is is caused by the shape of the bales on the end – they aren’t quite square. You can stuff loose straw in until you get near the edge where it just won’t stay. We mixed up some heavy clay-straw and put in some of the resulting depressions, though.

Rather than continue filling all of the depressions in the wall this way, we decided to go ahead and mix up some plaster. In The Natural Plaster Book Cedar Rose Guelberth and Dan Chiras refer to the first coat of plaster on the bales as the discovery coat. It reveals the topography of the bales, showing the depressions and high places. It’s a thin layer of plaster, about 1/8” to 1/4” thick.

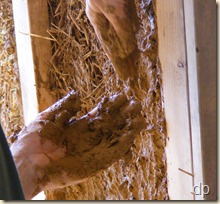
We screened some of the clay dirt I had stockpiled for the plaster using the 1/2” and 1/4” hardware cloth screens I had previously made. In the concrete mixer, we mixed together 5 gallons of clay Messy hands applying plasterwith 3 gallons of sand. Then we added water to achieve a nice consistency (not too wet, not too dry – we figured it out as we went along). The final ingredient was one gallon of chopped straw. We wanted the plaster for the discovery coat to be fairly wet/loose and clay-rich.

Once we had a batch of plaster mixed up, we took it over to the wall and started applying it to the straw bales. I had already trimmed the loose straws with a small electric weed eater/trimmer a few Plastering the first section of wallminutes before. Trimming the bales this way leaves a nice surface for the plaster to be pushed into so that it can adhere well.

We applied the plaster by hand, working it into the ends of the straw on the bales. The intention is for this coat to meld with the straw on the outside edge of the bale so that the plaster will be keyed in very well. Even though the first coat is thin, it is pushed an inch or more into the surface of the bale, intimately bonding it with the ends of the straw.

The first secton of wall after plasteringClay and straw are an ancient building material. Each one benefits the other. The straw helps hold the clay together, providing tensile strength. The clay protects the straw from the damaging effects of water as it absorbs and releases moisture and seals the straw away from the weather. The clay is absorbed by and fills the voids within the straw fibers themselves as the two meld together into a single entity.

We mixed up several batchesDepression in the wall revealed by the discovery coat and worked our way along the wall. We plastered about 20 feet of wall in three hours or so. Later, we’ll apply a second coat which will be thicker and will fill in voids and smooth out the surface. I will probably fill some of the deeper voids before we apply the actual second coat. I’m only planning on two good coats of plaster on the exterior before the siding is put on. The plaster will seal in and protect the bales from the weather, and the siding will be an additional layer of protection in order to keep water off of and out of the bale walls.

Tuesday, September 14, 2010

Pinning the bale wall

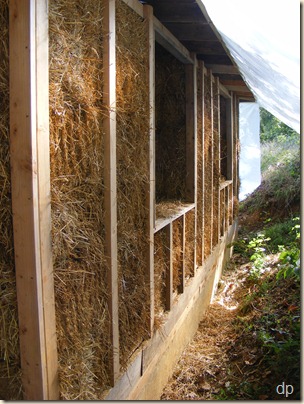
Straw bale wall from the outside

This morning the boys and I cut down several large saplings, mostly Mimosa which grows like a weed around here. We trimmed off any small branches and brought them to the house. Their purpose was to help strengthen the straw bale walls.

If you’ve read or watched anything about straw bale building, you may be aware that one of the accepted practices is to drive rebar through the bales in order to tie them together. In some places the code for a straw bale home requires rebar. After stacking the bales yesterday, it was clear that there is a good reason for some means of tying the bales together and increasing their rigidity.

I didn’t want to use rebar, and it isn’t the only way to achieve the desired end. I’ve read about another method and opted to use it. It involves pinning the bales with external pins, Mimosa sprouts in my case. fence staple for tying the wallSince I already have a frame work of 2x4s on the outside of the bales, I only need the sprouts/saplings on the inside of the walls.

To pin the walls this way, I put some fence staples into the edge of a 2x4 on the outside of the wall. Using my bale needle, I then pushed a loop of baling twine through to the inside of the wall leaving the two tail ends on the outside Mimosa pins in the wallnear the staple. I pushed these pieces through in four places on the 2x4 from top to bottom.

I inserted one of the Mimosa sprouts which had been cut to length to extend from the top to the bottom of the bale wall through the loops. Then, from the outside of the wall, I pulled the loops tight and tied the strings to the staples. My tying process involved cinching the strings tight enough to embed the sprouts into the face of the bales.

Tying the Mimosa sprouts tightly to the external framework really stiffened the wall. It imparts a lot of rigidity to the wall by connecting the bales together and holding them immobile against the outside of the wall. I was quite pleased. With Ramiah’s help, I was able to pin the walls in the sewing room/study.

Once we had pinned this section, the boys and I stuffed straw into the voids we could find between bales, both on the inside and outside. For the outside few inches, we used straw that had been dipped in clay slip. We used dry straw inside the middle of the wall since it would have a hard time drying there if it was wetted with the clay slip.

We’ll continue pinning bales and filling voids tomorrow. I was a bit too optimistic about plastering tomorrow, I think.

Here are some photos of the plastic sheeting I put up to protect the walls. I nailed a 24 foot long 2x8 at the bottom of each piece. This should keep the sheeting from blowing away if the wind picks up. It also allows it to be pulled back, making room to work on the wall under the plastic, and to be held in close to the house when it’s not necessary to work under it.

  Sheeting on west side  Sheeting on north side

Monday, September 13, 2010

The first straw bale walls

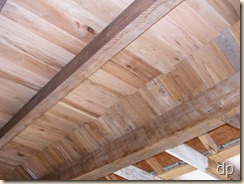
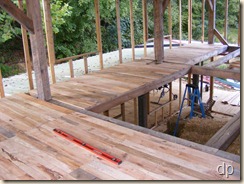
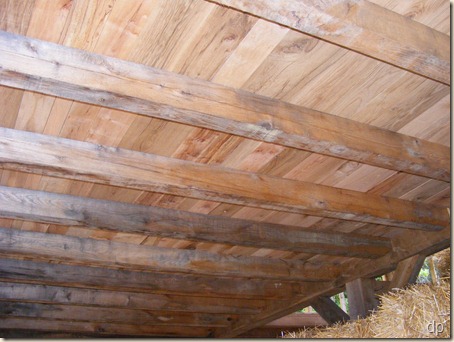
The work for today involved finishing the upstairs subfloor (aka the downstairs ceiling), getting things ready to stack some straw bales in a wall, and ceiling in the living roomactually stacking some bales.

While Dad and Jon worked on the floor/ceiling, I hung some 6 mil plastic from the rafters outside the mudroom, laundry room, and sewing room/study.  The plastic is there to keep any possible rain off of the straw bale walls until they’re plastered and/or sided. clay slip making setupI also screened some clay dirt and built a trough to hold clay slip for dipping edges of bales in.

The floor was finished by lunch time, so after lunch we mixed up some clay slip. Clay slip is a very fluid water-clay mixture, basically the thickness of heavy cream. I put water and screened dirt in the concrete mixer and let it mix for a few minutes. It doesn’t take long for clay particles to be suspended in the water.

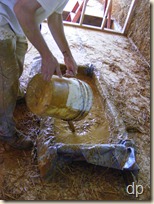
We put a little of the slip in the trough I made so we Putting clay slip into the troughcould dip the inside and outside edges of the straw bales in it. Dipping the edges of the bales in the slip gets some clay into the outer couple of inches of the bales, providing a little protection from the weather, but most importantly it helps the first coat of plaster to adhere better to the bales than it otherwise would. At least, that’s what I read and decided to try. One method of applying the slip to the bales is to spray it on with aThe corner where we began stacking bales drywall texture gun after the walls are erected. Dipping them eliminates the need for spraying and is probably less messy.

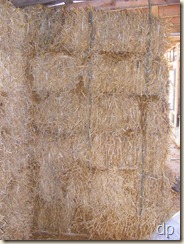
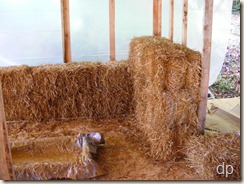
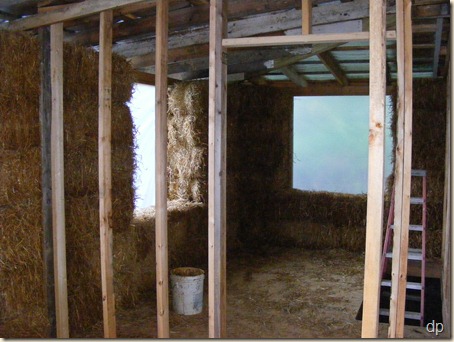
With the slip and trough ready, we put the first bale in the corner of the sewing room/study. We continued on from there until we had stacked the entire wall from the doorway onto the back porch all the way to the doorway out of the mudroom, a little over 50 feet of wall.

Some of the bales weren’t baled as tightly as I would’ve liked, but we worked with what we have. I think they’ll do alright.  Once they’re tied to the framework of the house, a job I intend to get done tomorrow, they’ll be secure. I’ll also fill a few voids in order to get the outside ready for plaster. If I can do that, we’ll start plastering this section on Wednesday.

There were several custom bales that had to be made.  My bale needle worked well for retying bales. With it it is simple to push string through at the desired distance from the end, bring it around, and tie a new bale. The standard bales range in length from 36” (a few are an inch or two shorter, but not many) to about 40”. We selected lengths that fit well, and made our own lengths when needed. There were quite a few reties necessary. Retying takes the most time of any task in the process.

View from the sewing room into laundry room View from mudroom into laundry room

Wednesday, September 8, 2010

Second floor subfloor

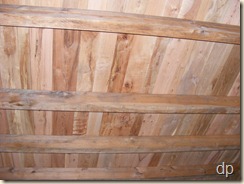
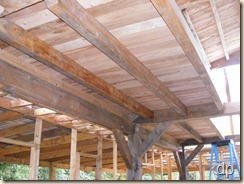
upstairs subfloorWe’ve spent several days preparing boards for the upstairs subfloor which is also the ceiling for the first floor. Previously, I bought some cull lumber for this purpose. I stickered the boards after culling out the ones that weren’t usable for the house. That was a few years ago (I can’t remember if it was three or four).

Jon and I ran a few of them through the planer several weeks ago when we had a lull in other construction tasks. Dad and I started planing the rest of the boards last week. We had to run each board through the planer three times, taking off about 3/32” each pass. A few boards were thicker and had to be run through more times. The final thickness was 15/16” with at least one side on each board smooth enough for the ceiling.

The next step in the process was cutting the boards to length. The original lengths were from 8 to 12 feet long. We cut them to 48”, 54”, and 67” lengths. Then, each board could be edged on the table saw before finally have a rabbet cut on each edge so there would be a lap joint when nailed into place.

We determined the necessary lengths of the boards based upon the spacing between the floor joists, wanting the boards to span across at least three joists. For most of them, that is 48”. It’s easier to edge shorter boards on the table saw than longer ones. Also, I’ve left the boards at various widths. boards ready to go to the houseSo, when they are installed, a row is put across which spans at least three floor joists, and then another row is put on.

While Jon and dad began installing the boards we prepared by Monday of this week, I finished cutting the rabbet joints in the remaining boards which had already been cut to length and edged. When I finished, I took them down to the house and checked on their progress. They were doing fine. So, while they worked on the floor, I put flashing on the front corners of the porch roof and installed the ridge cap.

The floor butts up against the cathedral ceiling at the front of the house. junction between the two ceilingsDad cut the edge of the board at 55 degrees to match the angle of the cathedral ceiling. The angle matched, but the boards didn’t line up perfectly because the existing ceiling is not perfect level across its face. That’s okay. I’ll cover this joint with some molding later on.

By the end of the day, we had the floor/ceiling on one side, the landing that will be at the top of the stairs, and the first section on the other side installed. We’ll continue putting the rest in on Friday. Tomorrow, I have to process a few more boards which are already planed (the ones Jon and I planed a few weeks ago). We need some more to finish the job. If I get those ready, we ought to be able to get the rest of the east side done in a few hours on Friday. Then, we might stack a few bales in one section.

   ceiling floor  The ceiling

Thursday, September 2, 2010

Light clay straw wall infill: trying it out

The other day I reread some of the information I have on using a mud plaster on straw bale walls. Since we’re getting close to erecting walls and plastering them, I thought it was a good idea to refresh my memory a bit. I also searched for information online and watched a few videos on the topic.

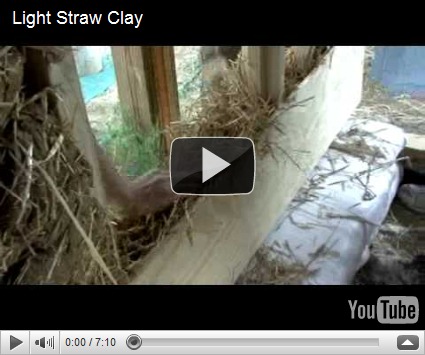
A couple of the videos I watched showed using a light clay straw mixture for infilling walls. The method uses slip forms between which straw that has been mixed with a clay slip (clay suspended in water to a heavy cream thickness) that is light and not too wet. This light clay straw mix is packed into the wall between the forms.

Here’s a video detailing the method:


After the light clay straw mix is packed into the form, the forms can be removed and the material is allowed to dry. Once it’s dry, it can be plastered over just like the straw bale walls.

I want to plaster the interior walls of the house like the straw bale walls. I’ve thought of plastering over drywall, but I like this light clay straw method better. It has a couple of advantages over drywall: it’s cheaper (since I have straw already) and it provides some insulation qualities. I’m primarily interested in sound insulation for the interior walls.

So, yesterday afternoon, the boys and I gave this method a try. We screened a little clay dirt and then put it in the concrete mixer with some water to make a clay slip. It made beautiful slip! We spread some loose straw on an old tarp and mixed it with some of the clay slip. It’s like mixing salad dressing into a salad. The goal is to coat all of the straw without getting it too wet.

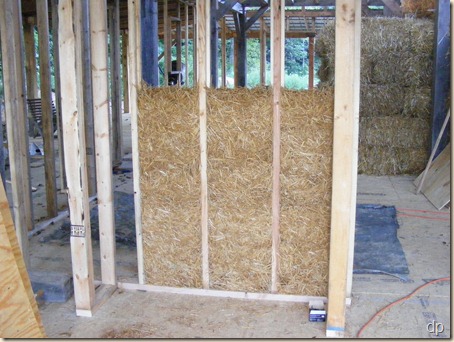
I screwed some pieces of 3/8” thick plywood onto an interior wall we framed on Monday, and the boys and I started packing the light clay straw into the wall. We packed a section of wall four feet wide by almost four feet high (my form boards are 2’ x 4’ pieces). After we finished packing, I removed the forms to reveal this result:

light clay straw in the wall another viewI think it looks great! We’ll probably finish this wall sometime soon, but I’ll wait on the others until after I’ve run the electrical wires and installed outlet/switch boxes.

The main lesson learned from this experience is to pack the mix a bit more than I did yesterday. the section at the bottom was actually packed better than the top two feet. There are a few voids in the wall in places, but we’ll fill these with a cob mix later (cob is a heavy clay straw mix) before plastering the wall. When we near the top of the wall, the challenge will be in packing the mix in. We’ll try packing it from one side with only one form in place. Alternatively, we’ll use a cob mix for the last six inches or so of wall at the top.

Wednesday, September 1, 2010

Bale needle

bale needleOne of the tasks required for building with straw bales is re-tying the bales to shorter lengths. A tool to facilitate this job is a bale needle. I could buy a set of plans for making one from strawbale.com, but I decided to make my own based upon the photos I found of a bale needle online.

I bought a three foot long 7/16” diameter smooth metal rod from the local hardware store. Using a cutting blade on a bench grinder, two different files, and a bench top belt sander, I cut notches near the end of the rod and ground the end to a point. I then welded a piece of round stock on the opposite end for a handle.

 notches for string and point handle

The notches in the rod hold the baling twine as it is pushed or pulled through the bale. There are two notches available for pushing two strings through and one notch for pulling string through.

We tried it out last evening on a bale, and it worked fine. Here’s a video by Andrew Morrison about how to re-tie straw bales to shorter lengths: