I’ve considered different options for the window sills in the house. One of the earlier ideas was to set stones in concrete – done right, this makes a very nice window sill/seat. Later, I decided to make them with wood, and I’ve been pondering upon how to build them.
On the first day of this week, I planed some poplar boards with the intention of using them for the window sills. Dad and I tried out the tongue and groove router bits I recently purchased on a couple of the boards. My idea was to put in a framework using 2x2s that the poplar boards would be nailed in to. As we routed out a couple tongues and grooves, I continued thinking about my method. As a result, I changed my plan for what to do.
I decided to use some 3/4” plywood as a sort of sub-sill and install finished boards later, probably using the same material as what I will use on the floor in the house. The plywood will give me a solid foundation to nail the finish boards to, and it actually will install more easily than the previous method I had in mind.
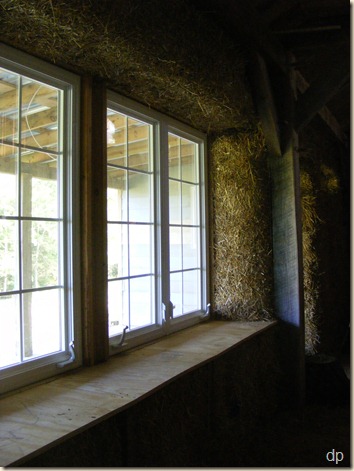
Wanting to try it out, I decided to start in the master bedroom. The first task was to shape the corners of the bales on the sides and above the window. I used my electric chain saw to knock off the corner of the bales on both sides and to cut 3/4” out 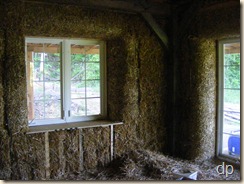 of the top of the bales below the window (to set the plywood at the right height).
Once I had the sides curved and the bales above shaped (I describe the basic process below), I cut plywood to install for the sill. I attached it below the window to some thin strips of wood I nailed to the framing below the window, setting the top of the plywood even with the top of the 2x4 at the bottom of the window. The finished boards will will butt up against the window on top of the 2x4 framing the bottom of the window opening. I also set some 2x2s flush with the exterior surface of the bales below the sill to provide extra support. 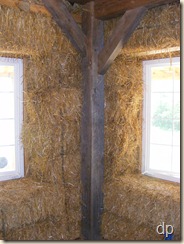 It turned out well. The photo of the window also shows one end of the opening for the sliding glass door which I also shaped.
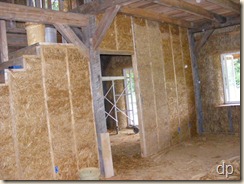
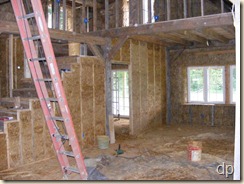
Today, I worked on the living room windows. Looking into the corner, you can see how they looked before I started. Although we tried to stack them straight, he ends of the bales were uneven. It’s quite easy to remove straw from the ends of the bales in order to make them more even.
The first step in shaping the bales around the windows was to cut the corners off. My electric chainsaw worked well for this. 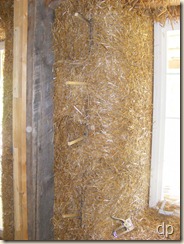 I found that it wasn’t necessary to try to round the corners.
The next step was to cut a length of poultry netting/chicken wire to fit the height of the window. I stapled one edge into the 2x4 framing on the side of the window. Then, I stuffed straw into the gaps between bales and added straw where the 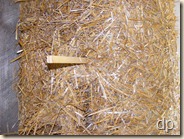 bale ends needed built out a bit. The chicken wire serves to hold the straw against the bales and to form the desired curve.
I pulled the chicken wire around the curve and anchored it to the bale wall with a short stick behind one of the hard wood sapling pins in the wall. I worked from bottom to top, pulling the wire tight, anchoring it, 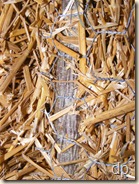 stuffing straw where needed, pulling the wire tight, adding another anchor, etc.
 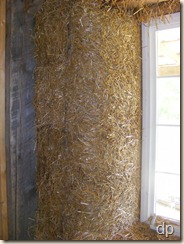 When I reached the top, the corner was rounded, and the wire was tight.
The final step was to staple the wire securely to the pin in the wall. With it stapled, I removed the anchor sticks and was ready for the other side.
When we stacked the bales, we laid a 2x6 across the window opening and secured it to the framework above so it wouldn’t sag. Then, the next course of bales was added on top of the 2x6. I needed to not only curve this edge above the windows, but I also needed to provide a 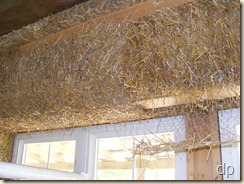 surface for the plaster to adhere to later.
Again, I knocked the corner of the bales off with the chainsaw and then attached chicken wire to the top 2x4 of the window framing. I put loose straw on the wire and stuffed it into some voids. Then, I pulled it up tight to the bales above the window, pounding it into the curve in order to shape it how I wanted it. A 2x4 of the bale shelf is exposed one bale course above the window, and I stapled the wire to this. I completed this process in sections across the window.
With both of the double sets of windows in the living room shaped, it was time to install the plywood for the window sill. While I was cutting off the corners earlier, I also cut the height of the bales below the window a little. The first step in doing that was to cut the strings of the bales (to keep the strings from getting tangled in the saw). Since the bales were already securely in the wall, 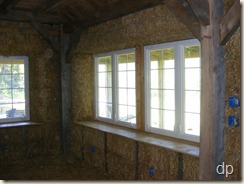 they weren’t going to go anywhere or fall apart with their strings cut.
I nailed a strip under the windows to attach that edge to and then laid the pieces of plywood I cut in place. With them nailed under the window, I attached some vertical pieces flush with the bale surface under the plywood. I used some pieces of oak that was close to 2”x2” which I had.
The plywood extends past the inside plane of the bales because I want the plaster to come up under it rather than in front of it. The plaster will actually help provide additional support for the sill. It should be solid since it’s attached front and back and rests on top of the straw bales.
