A video tour of the house filmed on September 7, 2012, just after we finished the 2nd coat of plaster on the downstairs walls.
A video tour of the house filmed on September 7, 2012, just after we finished the 2nd coat of plaster on the downstairs walls.
We were able to get back to plastering this last week. We spent the previous week getting the cisterns hooked up. The week before that was occupied with making hay while the weather was good for doing so.
We finished all of the straw bale walls in the downstairs by Friday, September 7, 2012. It took 28 batches to do them all. That’s nearly 3 tons more plaster on the walls once it’s all dry. So far, we’re up to 9 tons of plaster on the interior walls. That total will increase by another 3 tons by the time we’re done, I expect. I think of that as great thermal mass to help moderate the interior temperature during the year – warm in winter, cool in summer.
We hope to complete the second coat upstairs within the next two weeks.
Last summer, we buried three 1,500 gallon septic tanks (new ones) in front of the house to serve as a cistern for rain water collected off of the roof of the house. I also contracted with a local company to install 6-inch seamless gutters on the house. However, it took them a year before they came and completed the job. Thankfully, I wasn’t in a hurry. I patiently waited for them to do the job, calling them occasionally to find out when it would happen (it was almost always, “the first of next week unless the weather is bad”). Yeah, I could have hired someone else to install gutters, but the quote  I got from this company was $700 cheaper than the quote I got from another company, and it cost less than what it would cost for me to install gutters.
Anyway, they showed up in late June this summer and installed the gutters. It took me until the last part of August to finally plumb our water collection system from the downspouts to the cistern. It wasn’t difficult. 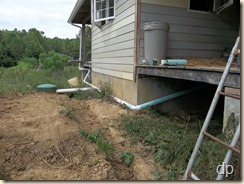 Basically, I ran 4-inch Schedule 35 sewer pipe from each of the four downspouts to the cistern. I installed a roof washer on the east side and on the west side of the house.
The roof washers purpose is to divert away from the cistern the first 100 gallons of water that come off of the roof in a rain storm. 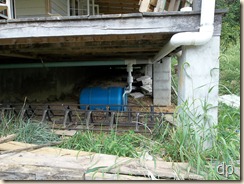 This allows dirt, bird droppings, and other contaminants that may have accumulated on the roof to be washed off with the beginning rain and not end up in our household water.
I contemplated upon how to design the roof washer system for the house. The design I settled on uses a 55-gallon barrel for each one. As water flows from the two downspouts on either side of the house, it flows into the barrel on that respective side. I used 2-inch PVC to connect to the barrel with a home-made floating ball valve in the line. 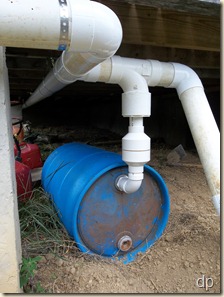 The initial rain off of the roof will not generally be more than the 2-inch pipe can handle. The water flows around a ball contained in the space inside two 4-inch to 2-inch reducers. When the barrel is full, the ball floats upward and closes off the entrance for the water into the barrel. This is to help insure that nothing in the barrel can be washed out and back into the line to the cistern.
For the floating ball valve to work, the barrel must be sealed. The water and little bit of air left in it when full keeps the ball from sinking, effectively closing the inlet to the roof washer. I laid the barrels on their side so that water flows in through the top bung into which a regular 2-inch threaded PVC connector threads (2-inch NPT). The other bung which has different threads (very course) can be opened to drain the water out of the roof washer barrel after a rain shower. 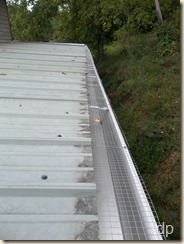 This system collects about 50 gallons on each side of the house before the water proceeds to the cistern.
We’ve had nearly 3 inches of rain during the last two weekends. I previously calculated that it would take about 2.5 inches of rain to fill the cisterns. My calculation was very close. The cistern was full and overflowing somewhere around 2.6 inches of rain. The overflow runs from the cisterns to the pond through a 100-foot section of 4-inch corrugated drain pipe.
The last thing I did to ready the system for water collection was to install 1/2-inch hardware cloth over the gutters. I bought 3-foot by 10-foot rolls of galvanized hardware cloth and cut it into 8-inch widths with a metal cutting blade. I inserted one edge two inches under the roof metal and attached it to the top of the outside edge of the gutters with self-drilling machine screws ever couple of feet. This keeps most of the leaves out of the gutters and out of the cistern. A few leaves that get through will end up in the roof washers. The rest of them are screened out before the water enters the cistern (it’s run through window screen). Before we use the water in the house, it will run through an inline screen filter, and all drinking water will be filtered with a ceramic filter or a reverse osmosis filtration system.
The second coat (also called the brown or infill coat) of plaster takes a lot of mud. Of course, we already knew that based upon our plastering experiences two years ago when we finished the exterior of the house.
The recipe that I’ve been using for the second coat is different than the recipe for the first coat (also called scratch or discovery coat). The first coat has a fairly high clay content. I used 1.5 parts clay-rich dirt to 2 parts sand. It can be done with equal parts clay and sand (there are variations depending on the clay content of the dirt being used). The more clay there is in the mix, the more cracking that occurs when the plaster dries. This is because clay expands when wet and shrinks when it dries. So, as the plaster dries, it naturally shrinks, and the shrinkage causes cracks (something has to give somewhere). For the first coat, that’s not a big deal – the cracks will be filled by the next coat and will actually help the second key into the first.
For the second coat I started with a mix using 1 part clay to 2 parts sand, but I’ve adjusted that on the last four batches to 1 part clay to 2.5 parts sand. Although cracks on this coat of plaster aren’t a real problem because they will be covered by the finish coat, I would like to minimize them as much as is realistic.
I’ve noticed that cracks are more apt to appear in areas where the plaster is thicker on the wall, presumably because the thinner areas surrounding the thicker dry faster, shrinking as they do. The thicker areas take longer to dry and are still wet enough to be weaker and therefore the first place to give. Less clay in the mix will allow less shrinkage and fewer cracks. The important part is that the plaster be strong enough, a characteristic dependent to a large extent upon the clay which is the substance that binds the plaster together, that makes it work (sand and water doesn’t make a good plaster).
We’ve mixed 12 batches of plaster for the second coat so far. We started in the kitchen, because I want the walls there to dry so we can put up the green board. They are mostly dry now, with only a few areas still damp. The weather played a role in that – it was humid and overcast with rain for several days. That’s not good drying weather. But, drier weather has returned, allowing the process to continue as needed.
The kitchen windows were the first ones I did with the second coat. They went well. The greatest challenge is above the windows. Somehow, gravity seems to work against me, causing plaster to fall. Sometimes it’s because it sticks to my hands more strongly than it sticks to the first coat, I think. But, once it’s pressed in firmly and troweled, it does fine. 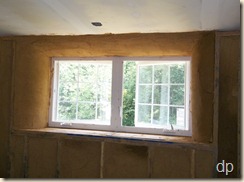 It’s just initially that a fair bit falls to the window sill. I pick it up and use it anyway (it’s not like it’s going to get dirty).
After the plaster is troweled and shaped, the windows look good. The important thing is to get the shape on the walls with this coat. Around the windows that means the curves I want. On the rest of the walls, the kitchen walls excepted, the idea is to even them out and give them the shape and smoothness desired in the final product. 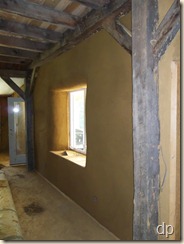 There will be a few areas that will need a third coat, though – some of the low spots require 4 inches or so of plaster, and that is too much at one time in some areas.
After the kitchen, we moved along the wall into the dining room. This wall has the most area to be plastered of all the wall sections. It’s 14 feet long, 9 feet tall, and has only one window. We finished it yesterday and then moved on to the living room walls. As you can imagine looking at the photo (to the right – click to e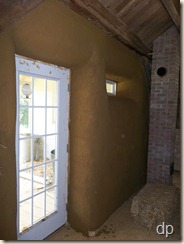 nlarge any of the photos), the areas above the braces on the timber frame present some challenges because of the limited space to work in.
The wall near the chimney behind where the wood stove will be located presented the challenge of plastering behind the chimney. It wasn’t too bad, and, thankfully, it will not be seen anyway. 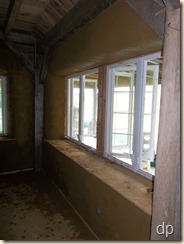 This section of wall will require a third coat in places because of the depth of some low spots.
We moved on from the chimney, around the front door and to the double windows in the living room. We didn’t finish the living room walls today, but we’ve got a good start. It should only take one more batch to finish the second wall. The front wall is done.
We mixed and applied three batches of finish coat on the interior packed walls in the master bedroom earlier in the week. Interestingly, the finish plaster that we put on the upstairs walls a 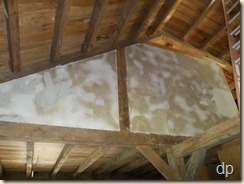 few weeks ago did not dry white as expected. It is white in places, but not as uniformly as I anticipated, like it did when I did a test patch last year after buying the kaolin clay. The only difference I know of in the mix is the addition of wheat paste. I bought some dried wheat past to help bind the plaster together, and I think it is keeping some of the clay from working to the surface when I hard trowel and buff the plaster. That’s okay because we’re going to paint all the walls with a clay paint anyway. The wheat paste does a good job binding
 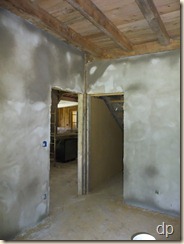 the plaster, though, and it keeps the clay from dusting off if you rub on it. It makes a nice finished surface.
It looks like the walls in the bedroom may dry mottled in color, too. There are a few cracks that have developed as the plaster is drying. I’m going to adjust the amount of clay in the recipe. My books recommended more clay in the final coat than I expected, and I went with their recommendation. I think less clay will still work fine and will allow fewer cracks. I need to get some silica sand so that I can mix up some plaster with it to repair the cracks. Masonry sand, even when screened through a window screen, has too many large pieces to make a good patch plaster. I’m going to want some fine silica sand for the clay paint anyway.
In the next few weeks, I’m going to experiment with the clay paint, mixing up different batches to find a recipe that I like. It should be fun trying it out with additives like mica powder and/or mica flakes. I also have some natural yellow ochre pigment to see if I can come up with a nice pale yellow.
On Wednesday this week, we decided to put the finish coat of plaster on the walls above the open, center section of the house. I wanted to get the scaffolding out, and we needed it for doing these walls.
I purchased some wheat paste from Natural Craft Supply the previous week which arrived this week. I can make my own wheat paste for less money using high-gluten white flour, but the product I bought is easy to use and works well. The idea with the wheat paste is that it works as a binder in the plaster. Basically, it’s a glue made out of flour (traditionally, it’s been used to glue wall paper to the wall). It helps to hold the plaster together more strongly and keeps the surface from dusting off when it’s dry. It works, too.
Our recipe for the finish plaster was to screen 5 gallons of sand through a window screen (it is amazing how many rocks can be screened out of sand). Then, we mixed in 3.25 gallons of dry, powdered, white kaolin clay by hand. 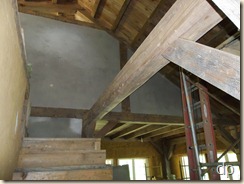 Once that was mixed, we mixed in 1.5 pounds of wheat paste (about 3 cups of dry powder). The next step was to add water and mix thoroughly. It’s amazing how much water it can absorb – about 4 gallons.
We found that it is easiest to smear the plaster on with your hands after dampening the wall (we use a garden sprayer) and then trowel it as smooth as possible, adding or removing material as necessary. After the plaster has begun to set up a little as it begins to dry, I came back over it with a pool trowel to take out trowel marks from the previous step. I tried buffing it with a yogurt container lid, but I liked the trowel better.
The plaster looks gray when it’s wet, but it dries to a white color. Later, I will mix up an alis to paint the walls with. An alis is a clay-based paint (clay, fine silica sand, wheat paste, and water). This will help even out the color (white because we’re using white clay – I’m not intending to put in any pigments) and seal up the finish coat a little more.
Yesterday, the boys and I straightened things up in the house and swept the floors. We also removed the scaffolding from the center of the house. I took a few photos to share.
The photo below is one from three that my camera stitched together – the beams are not really curved like that.
We finished the first coat of plaster on the interior walls on Tuesday of this week. We’ve been working on this goal for the last month. It took 59 batches of plaster to get the first coat done – about 6 tons of dry material.
We finished the upstairs rooms on Monday, leaving the pantry and a couple of miscellaneous spots to be plastered on Tuesday. It was nice to finish this step.
Next, we’ll be put the second coat on the straw bale walls. This should go easier because it won’t be necessary to work the plaster into the bales.
When we finished plastering the kitchen walls, the only thing left to do downstairs was the pantry.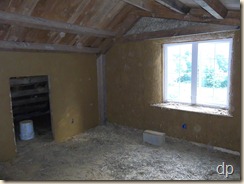 We decided to save it until after we finished the first coat upstairs. I mixed up a batch of plaster and got the boys busy putting it on the walls while I worked around the windows.
I was thinking of putting boards above the windows upstairs because of their location. It turned out that I could plaster above the windows on the ends upstairs, though.  So, I had to take down the support boards I had under the bales and put up chicken wire. The bales were actually wedged in very well and didn’t move without the boards to support them.
Then, I had to prepare some oak boards for above the windows on the rear of the house upstairs. 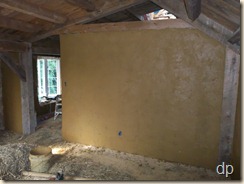 I planed some boards from some trees we had cut and milled about 8 years ago. Then, I edged them, cut lap joints, and cut them to the proper length before nailing them in place. They turned out really nice and finish
  out the windows well.
Last week we were able to get back to plastering the interior walls full time. We finished the small section in the master bathroom that needed done and moved on to the upstairs walls in the center, open part of the house. We also plastered the wall and around the window in on the landing upstairs.
Another project was to install 2x2 framing on the kitchen walls. I’m going to build in the cabinets and wanted a smooth surface against which to build them. We’re also going to have tile backsplash above the counter and below the upper cabinets. There needs to be something to attach the cabinets to, also. I’m going to put up green board (moisture-resistant drywall) on the kitchen walls. The straw bale walls will be plastered behind the drywall to make sure they are well sealed.
So, once I finished the studding, we plastered the kitchen walls with the first coat. Around the windows and the door, the plaster will be shaped to meld with the surfae of the drywall.
One other project we completed last week was to put down 1/2 inch plywood underlayment upstairs. We have hard wood (oak, maple, and hickory) boards for a subfloor  upstairs which also makes the ceiling downstairs. The underlayment will provide a more even surface for installing the finished hardwood floor on later. It will also serve to keep some of the dirt and mess from plastering from sifting through the cracks. Actually, we’ve already had a fair bit of dirt work its way through the cracks and fall from the ceiling downstairs. So, before we could put the underlayment down, we had to clean out as much of the dirt as we could. We used the air compressor with an air nozzle and a vacuum to get as much as we could. We also put down red rosin paper before the plywood. We’ll have another layer of the rosin paper under the finished hardwood.
I’ve let a few weeks pass without posting, but that doesn’t mean that we haven’t been working. Actually, there were two weeks that we took off from work on the house (not completely, but mostly) for a variety of reasons, including 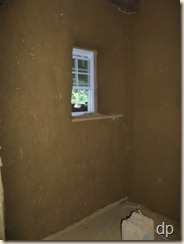 Anne and I celebrating our 22nd anniversary and my finishing up my summer classes.
We continued from where were left off in the last post by finishing in the hallway outside of the guest room and also plastering the walls in the main bathroom. Smearing mud plaster on the walls is not difficult. We just make sure that on raw bales or packed walls that the plaster is worked into the straw well. This first coat provides the foundation for the rest of the plaster, making it important that it is keyed into the straw well. Around the windows, this involves pressing the mud into the straw through the chicken wire used to curve the edges. The straw in these areas is mostly parallel with the surface.  On the regular edges of the straw bales the ends of the straws are oriented toward the surface which is much easier to work the plaster into.
One difficulty revealed itself above the back door. Above the windows and the other doors, I used chicken wire to hold the straw in the right shape, but above the back door there was no where convenient to attach the wire at the top above the door. So, I didn’t use any wire and instead just shaped the edge of the bales. This part was fine. The problem was the board that I used to support the bales above the door –  the plaster didn’t stick to it once it dried. I’ll have to remedy this later.
Once we finished the bathroom, we moved on to the master bedroom. We plastered in the closet, the walls in the bedroom, and in the master bathroom. We had all the walls except for a small section in the bathroom finished before we ended up taking off the two weeks.
There were several things to do this last week that did not involve the house, but we were still able to mix and apply several batches of plaster.
On Monday, the boys and I worked all day plastering the walls in the laundry room. We mixed seven batches of plaster and put them on the walls. 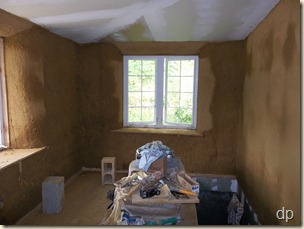 Each batch weighs around 240 pounds wet. Once it dries, it’ll lose about 40 pounds per batch (a five-gallon bucket of water). So, that’s 1,400 pounds of thermal mass on just these four walls alone. If we count all the walls we’ve done so far (including the walls we did on Friday that I haven’t mentioned yet), it figures out to about 3,500 pounds of thermal mass, and we’ve only put the first coat on a few of the walls. There is still the second coat on the straw bale walls to be figured and a finish coat on all the walls.
 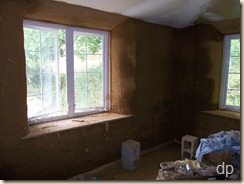 I find it interesting to think about the mass of the plaster that will help moderate temperature and humidity (clay is good for that) when the house is done.
I took the photos today of the plaster we applied last week. So, you can see that it is drying nicely. It’ll be cured within the next week, I expect. The places where it is thicker will take longer to dry thoroughly, but there’s not really any hurry. The only concern is mold. If the weather cools off and it is damp, the plaster won’t dry quickly like it does when it is warm with a good breeze blowing through the house. We had a few areas on the  walls that we packed with slip straw last fall that grew some mold on the surface because the drying conditions deteriorated after we packed them.
I’m not really worried about the mold. It seems to originate in some of the straw that is used in the mixes, probably because of the presence of mold spores. It can only survive and grow in moist conditions. I have discovered a safe way to kill it and prevent it from spreading – white distilled vinegar. We sprayed walls that grew mold after packing last year, and it took care of the problem. There have been a few places where some mold appeared on the surface of the plaster when the drying conditions  were not ideal recently. A little vinegar kills it quickly. I’m sure if it was a major case, not just a little here or there, that there might be some other remedies needed, but this one is working for us.
So, after doing all the walls in the laundry room, we didn’t get back to plastering until Friday. We only had the afternoon, and we worked in the guest room. We were able to get 2 walls done. We’ll finish this room tomorrow if all goes well. And, we’ll do a few more walls, too. It is reasonable for us to finish the first coat on all the downstairs walls this week.
Since we have all the interior walls packed, it was time to focus on plastering. We did a little plastering a few weeks ago – just one batch. The boys both commented that they would rather play in the mud than pack the walls. So, they seemed happy to plaster.
We started with the dining area wall on Tuesday after doing some cleaning up on Monday. This was the largest of straw bale walls to be plastered, 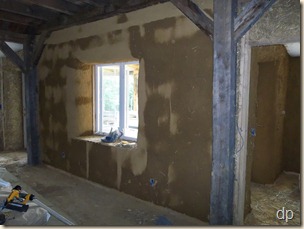 considering walls as areas between posts or on one side of a specific rooms. This wall is 9 feet tall and 14 feet wide with only one window. The thing with plastering the straw bales is that we have to work the plaster into the straw. The goal is to get it pressed into the bales an inch or two. Also, around the windows where I curved the bales, I really have to work the plaster in. I used chicken wire on the curves. So, I have to press the plaster through the wire and work it into the straw with my fingers. When the ends of the straw face outward, it’s easier to work the mud in, but when the straws lay cross ways, like most do in the curves and on the ends of bales, it takes more effort to work it in.
So, I worked the plaster in on the window curves while the boys worked on the sides and below. 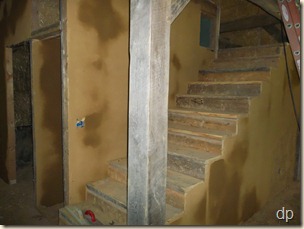 Once I got the curves done, I helped finish up the rest of the wall and make sure it was all pressed in to the bales as desired.
On Wednesday, we decided to plaster some of the slip straw walls. Having done a little of this previously, we knew that it goes on much easier than the straw bale walls. You don’t have to work it in the same way. Our process involved the boys smearing the plaster on the walls with their hands. I would follow with a trowel to smooth and even out the plaster. We were able to finish the wall below the stairs, the wall along the stairway, and almost all of the walls in the hallway, 
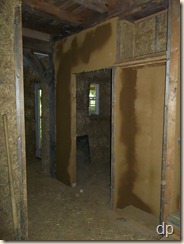 including in the linen closet but not the cabinet above.
We actually finished these walls in the morning and then spent time in the afternoon sifting some more clay dirt. We’re using clay that we excavated when digging the root cellar. I ran the tiller through the clay pile to loosen things up and then we screened it through 1/4” hardware cloth to remove rocks and larger clods of clay. This makes a nicer mix of plaster. We screened it into half of a 275 gallon tote – 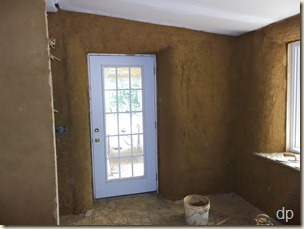 the same thing we mixed the slip straw in, only we put the metal frame around it to give it some rigidity.
On Friday, we plastered in the mudroom. We were able to get all of the walls plastered in there except for a small section above the interior door. We had two walls of straw bale and two of slip straw. There were curves around and above one window and the exterior door.
I calculated that in the three days of plastering that we mixed and applied 1,500 pounds of plaster. Once the water dries out of it, that is 1,200 pounds of plaster. This is only the first coat, too. 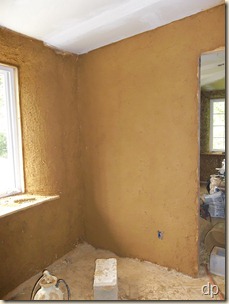 The straw bale walls will require a second heavier coat to fill in the irregularities, maybe even a third coat. The slip straw walls will only require one more coat. At this rate, we will have several tons of thermal mass on the walls which should help moderate the interior temperature during the summer and winter.
Each batch of plaster consisted of 2 buckets of sand, 1.5 buckets of clay-rich dirt, one bucket of water, and half a bucket of chopped straw. I mixed it in the concrete mixer, using my hand to help ensure that the sand was mixed through properly. It made a nice easy to apply plaster.
We’ll be mixing up a lot more in the coming weeks.
I’ve been thinking about and intending to put together a video on using light straw clay, also known as slip straw, in interior walls. The boys and I have packed 1,100 square feet of walls now. So, we have a little experience. I figure that I really was learning how to do it by the time we finished this week, but I’m not going to go back and start over!
Anyway, I figured it would be best to shoot some video on the process before we got it all done. As we worked on the final walls, I videoed different parts of the process, and then I spent some time over a couple of days to put together an instructional video called Straw in the wall: using light straw clay (slip straw) as interior wall fill.
A while ago I finished curving the straw bales around all of the windows downstairs and installing 3/4 plywood window sills. Upstairs, I hadn’t gotten all of the window sills/seats put in and had one windows to curve the bales on either side. I got those done today.
After finishing packing slip straw in all the walls, some of the plywood I had been using for forms was now available. I just had to rip the pieces to the proper width and cut them to the right length so that I could install them. There was only one window that needed the bales curved, the one on the west end upstairs.
It looks good to have the windows finished. I still need to do above them, but that will entail putting in some nice boards rather than rounding bales like I did downstairs. I’ll do that later.