Introduction

The 57 acres that comprise Cedar Ridge Farm are located in the beautiful rolling hills of South Central Kentucky. My wife, our four children, and I are on a homesteading adventure as we work toward increased self-sufficiency. We grow much of our own food and enjoy being in touch with the agrarian roots of our lives.

One of the major projects we have undertaken is the building of our own home. The house we're building has three major distinguishing features: 1. we're building it without incurring any debt; 2. it is a timber frame structure; and 3. the exterior walls will be plastered straw bales. We live debt and mortgage free, and building our house with that approach makes perfect sense. Large timbers in a home possess a beauty and project a sense of strength, stability, and warmth that we want in our home. Straw bale walls provide insulation and make ecological sense. This blog is a record of our home-building project.

Friday, July 27, 2012

Plaster, studs in the kitchen, & underlayment

Last week we were able to get back to plastering the interior walls full time. We finished the small section in the master bathroom that needed done and moved on to the upstairs walls in the center, open part of the house. We also plastered the wall and around the window in on the landing upstairs.

002003004006

Another project was to install 2x2 framing on the kitchen walls. I’m going to build in the cabinets and wanted a smooth surface against which to build them. We’re also going to have tile backsplash above the counter and below the upper cabinets. There needs to be something to attach the cabinets to, also. I’m going to put up green board (moisture-resistant drywall) on the kitchen walls. The straw bale walls will be plastered behind the drywall to make sure they are well sealed.

So, once I finished the studding, we plastered the kitchen walls with the first coat. Around the windows and the door, the plaster will be shaped to meld with the surfae of the drywall.

009012

One other project we completed last week was to put down 1/2 inch plywood underlayment upstairs. We have hard wood (oak, maple, and hickory) boards for a subfloor 008upstairs which also makes the ceiling downstairs. The underlayment will provide a more even surface for installing the finished hardwood floor on later. It will also serve to keep some of the dirt and mess from plastering from sifting through the cracks. Actually, we’ve already had a fair bit of dirt work its way through the cracks and fall from the ceiling downstairs. So, before we could put the underlayment down, we had to clean out as much of the dirt as we could. We used the air compressor with an air nozzle and a vacuum to get as much as we could. We also put down red rosin paper before the plywood. We’ll have another layer of the rosin paper under the finished hardwood.

Mud in June

I’ve let a few weeks pass without posting, but that doesn’t mean that we haven’t been working. Actually, there were two weeks that we took off from work on the house (not completely, but mostly) for a variety of reasons, including 005Anne and I celebrating our 22nd anniversary and my finishing up my summer classes.

We continued from where were left off in the last post by finishing in the hallway outside of the guest room and also plastering the walls in the main bathroom. Smearing mud plaster on the walls is not difficult. We just make sure that on raw bales or packed walls that the plaster is worked into the straw well. This first coat provides the foundation for the rest of the plaster, making it important that it is keyed into the straw well. Around the windows, this involves pressing the mud into the straw through the chicken wire used to curve the edges. The straw in these areas is mostly parallel with the surface. 007On the regular edges of the straw bales the ends of the straws are oriented toward the surface which is much easier to work the plaster into.

One difficulty revealed itself above the back door. Above the windows and the other doors, I used chicken wire to hold the straw in the right shape, but above the back door there was no where convenient to attach the wire at the top above the door. So, I didn’t use any wire and instead just shaped the edge of the bales. This part was fine. The problem was the board that I used to support the bales above the door – 011the plaster didn’t stick to it once it dried. I’ll have to remedy this later.

Once we finished the bathroom, we moved on to the master bedroom. We plastered in the closet, the walls in the bedroom, and in the master bathroom. We had all the walls except for a small section in the bathroom finished before we ended up taking off the two weeks.

020026

Sunday, June 17, 2012

Continuing to put mud on the walls

There were several things to do this last week that did not involve the house, but we were still able to mix and apply several batches of plaster.

On Monday, the boys and I worked all day plastering the walls in the laundry room. We mixed seven batches of plaster and put them on the walls. 008Each batch weighs around 240 pounds wet. Once it dries, it’ll lose about 40 pounds per batch (a five-gallon bucket of water). So, that’s 1,400 pounds of thermal mass on just these four walls alone. If we count all the walls we’ve done so far (including the walls we did on Friday that I haven’t mentioned yet), it figures out to about 3,500 pounds of thermal mass, and we’ve only put the first coat on a few of the walls. There is still the second coat on the straw bale walls to be figured and a finish coat on all the walls. 009I find it interesting to think about the mass of the plaster that will help moderate temperature and humidity (clay is good for that) when the house is done.

I took the photos today of the plaster we applied last week. So, you can see that it is drying nicely. It’ll be cured within the next week, I expect. The places where it is thicker will take longer to dry thoroughly, but there’s not really any hurry. The only concern is mold. If the weather cools off and it is damp, the plaster won’t dry quickly like it does when it is warm with a good breeze blowing through the house. We had a few areas on the 013walls that we packed with slip straw last fall that grew some mold on the surface because the drying conditions deteriorated after we packed them.

I’m not really worried about the mold. It seems to originate in some of the straw that is used in the mixes, probably because of the presence of mold spores. It can only survive and grow in moist conditions. I have discovered a safe way to kill it and prevent it from spreading – white distilled vinegar. We sprayed walls that grew mold after packing last year, and it took care of the problem. There have been a few places where some mold appeared on the surface of the plaster when the drying conditions 004were not ideal recently. A little vinegar kills it quickly. I’m sure if it was a major case, not just a little here or there, that there might be some other remedies needed, but this one is working for us.

So, after doing all the walls in the laundry room, we didn’t get back to plastering until Friday. We only had the afternoon, and we worked in the guest room. We were able to get 2 walls done. We’ll finish this room tomorrow if all goes well. And, we’ll do a few more walls, too. It is reasonable for us to finish the first coat on all the downstairs walls this week.


002005

Sunday, June 10, 2012

Putting mud on the walls

Since we have all the interior walls packed, it was time to focus on plastering. We did a little plastering a few weeks ago – just one batch. The boys both commented that they would rather play in the mud than pack the walls. So, they seemed happy to plaster.

We started with the dining area wall on Tuesday after doing some cleaning up on Monday. This was the largest of straw bale walls to be plastered, 009considering walls as areas between posts or on one side of a specific rooms. This wall is 9 feet tall and 14 feet wide with only one window. The thing with plastering the straw bales is that we have to work the plaster into the straw. The goal is to get it pressed into the bales an inch or two. Also, around the windows where I curved the bales, I really have to work the plaster in. I used chicken wire on the curves. So, I have to press the plaster through the wire and work it into the straw with my fingers. When the ends of the straw face outward, it’s easier to work the mud in, but when the straws lay cross ways, like most do in the curves and on the ends of bales, it takes more effort to work it in.

So, I worked the plaster in on the window curves while the boys worked on the sides and below. 017Once I got the curves done, I helped finish up the rest of the wall and make sure it was all pressed in to the bales as desired.

On Wednesday, we decided to plaster some of the slip straw walls. Having done a little of this previously, we knew that it goes on much easier than the straw bale walls. You don’t have to work it in the same way. Our process involved the boys smearing the plaster on the walls with their hands. I would follow with a trowel to smooth and even out the plaster. We were able to finish the wall below the stairs, the wall along the stairway, and almost all of the walls in the hallway, 007006including in the linen closet but not the cabinet above.

We actually finished these walls in the morning and then spent time in the afternoon sifting some more clay dirt. We’re using clay that we excavated when digging the root cellar. I ran the tiller through the clay pile to loosen things up and then we screened it through 1/4” hardware cloth to remove rocks and larger clods of clay. This makes a nicer mix of plaster. We screened it into half of a 275 gallon tote – 013the same thing we mixed the slip straw in, only we put the metal frame around it to give it some rigidity.
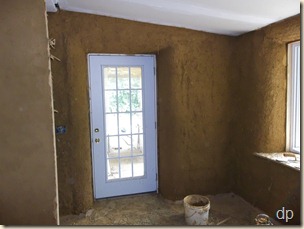
On Friday, we plastered in the mudroom. We were able to get all of the walls plastered in there except for a small section above the interior door. We had two walls of straw bale and two of slip straw. There were curves around and above one window and the exterior door.

I calculated that in the three days of plastering that we mixed and applied 1,500 pounds of plaster. Once the water dries out of it, that is 1,200 pounds of plaster. This is only the first coat, too. 011The straw bale walls will require a second heavier coat to fill in the irregularities, maybe even a third coat. The slip straw walls will only require one more coat. At this rate, we will have several tons of thermal mass on the walls which should help moderate the interior temperature during the summer and winter.

Each batch of plaster consisted of 2 buckets of sand, 1.5 buckets of clay-rich dirt, one bucket of water, and half a bucket of chopped straw. I mixed it in the concrete mixer, using my hand to help ensure that the sand was mixed through properly. It made a nice easy to apply plaster.

We’ll be mixing up a lot more in the coming weeks.

Friday, June 1, 2012

Straw in the wall: an instructional video on slip straw

I’ve been thinking about and intending to put together a video on using light straw clay, also known as slip straw, in interior walls. The boys and I have packed 1,100 square feet of walls now. So, we have a little experience. I figure that I really was learning how to do it by the time we finished this week, but I’m not going to go back and start over!

Anyway, I figured it would be best to shoot some video on the process before we got it all done. As we worked on the final walls, I videoed different parts of the process, and then I spent some time over a couple of days to put together an instructional video called Straw in the wall: using light straw clay (slip straw) as interior wall fill.


Window seats upstairs

A while ago I finished curving the straw bales around all of the windows downstairs and installing 3/4 plywood window sills. Upstairs, I hadn’t gotten all of the window sills/seats put in and had one windows to curve the bales on either side. I got those done today.

After finishing packing slip straw in all the walls, some of the plywood I had been using for forms was now available. I just had to rip the pieces to the proper width and cut them to the right length so that I could install them. There was only one window that needed the bales curved, the one on the west end upstairs.

It looks good to have the windows finished. I still need to do above them, but that will entail putting in some nice boards rather than rounding bales like I did downstairs. I’ll do that later.

001004006

The walls are all packed!

On Wednesday of this week, the boys and I finished the last wall to be packed. All of the interior walls have been packed with slip straw, and once the last ones are completely dry (by the end of next week), all of them will be ready for plaster. We’ll be focusing on the plastering job we have starting soon.

We calculated that we packed 1,100 square feet of walls in the house and used about 50 straw bales (give or take). We didn’t keep track of how many hours of work that entails, but it was several. It’s nice to have that part of the project done.

014016017018
