Introduction

The 57 acres that comprise Cedar Ridge Farm are located in the beautiful rolling hills of South Central Kentucky. My wife, our four children, and I are on a homesteading adventure as we work toward increased self-sufficiency. We grow much of our own food and enjoy being in touch with the agrarian roots of our lives.

One of the major projects we have undertaken is the building of our own home. The house we're building has three major distinguishing features: 1. we're building it without incurring any debt; 2. it is a timber frame structure; and 3. the exterior walls will be plastered straw bales. We live debt and mortgage free, and building our house with that approach makes perfect sense. Large timbers in a home possess a beauty and project a sense of strength, stability, and warmth that we want in our home. Straw bale walls provide insulation and make ecological sense. This blog is a record of our home-building project.
Showing posts with label block. Show all posts

Sunday, June 13, 2010

Nearing the end of foundation work

The foundation has taken a lot of work and time. I didn’t realize how much before I started on the root cellar and crawl space walls. We’re nearing the end of this phase of the construction, though.kitchen crawl space wall

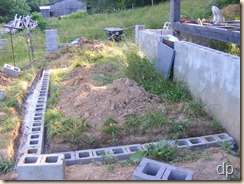
With the footers poured for the kitchen crawl space wall and the porch piers, we were able to get blocks laid last week. The kitchen wall was dry stacked. We should be able to coat it with surface bonding cement this week. There has been a delay in obtaining a few bags of SBC because the local place no longer keeps it in stock. Dry stacking does seem to go fairly quickly, and it’s easy to do, including surfacing the walls.

Porch piersI mortared the blocks for the porch piers. I was going to dry stack them, too, but I wanted to try mortaring them. They turned out pretty well, I think. We took time to make sure the outer edges were in line and that the piers were level and plumb.

On Friday we added some thinner blocks to the top of the piers (which were constructed with 12” x 16” blocks) to bring them to the proper height all the way around. The solid blocks in 2”, 2.5”, and 4” are 8”x16”. So, we scored and broke them to 12” to fit on the outside edges of the 12” blocks. Then, we mortared them in place.

I want the piers to match the foundation walls, but I didn’t want to pay for surface bonding cementStuccoed piers (Quickwall costs somewhere in the neighborhood of $23 per bag). So, I bought some mortar/stucco mix to coat them with. We started stuccoing them on Friday.

The stucco mix works a little differently than surface bonding cement. I think the SBC is easier to apply. But, after a couple of piers, Jon and I were beginning to get the hang of it. We have only a few more to do on one side and the back of the house. These are the shortest piers. So, they shouldn’t take too long to finish on Monday.

Along the east side of the houseWe also added a few more j-bolts to anchor the sill plate to the foundation wall. We ought to be able to mill the plates to the right thicknesses this week and get them put on. Then, we’ll progress to framing the porch.

We’re looking forward to beginning a new phase in the construction.

Wednesday, June 2, 2010

Footers and piers

With the return of warmer and drier weather, I’m able to get back to working on the house. There are a lot of different projects vying for my attention, but the urge to get this house done so that we can move in by next summer is upon me. I really want it finished. It is within reach.

I have worked on a related project during the last few weeks: a cistern to catch rain water. The cistern is located in the shed section of the garage which is near our current home which is at the top of the hill. We’ll harvest rain water off of the garage roof. I’ll run a 1.5 inch water line down to the house which is 50 to 60 feet lower in elevation. This should provide at least some of our water pressure. Later, I will build a cistern to harvest rain water off of the house, too. We will not hook up to city water.

We also will not hook up to the grid for electricity. We are currently using a solar electric system that I put together and installed. When we move into the new house, I’ll re-install the system for it.

We also decided to not put in a septic system. We’ll use sawdust toilets and compost it. You can read about this system in the Humanure Handbook. It’s simple and effective. It turns a waste into a resource.

Sometime at the end of last year, we changed one part of our house design. The kitchen extend out from the frame into part of what would have been the porch near the corner of the house. It will extend out 9 feet and be 12 feet wide. This will make it a non-traffic area and allow there to be a door off of the main kitchen into what will be the summer kitchen.

In order to affect this change in the design, I have to build a block wall to enclose the crawlspace under the kitchen. The space under summer kitchen will not be enclosed with block. The summer kitchen will actually be an enclosed portion of the porch on the corner toward the barn. I will probably use some cement board to enclose underneath it later on.

Last week, I started digging for the footer for the kitchen crawlspace wall and for the footers that will be under the piers that will support the porch. Actually, I had help. My good friend Jon is working with me two days a week this summer, and he helped with the digging. Having Jon working with me keeps me more focused and on task because I want to be sure and have plenty to keep him busy on the days that he’s here.

We finished excavating with shovels for all the footers last Monday. On Wednesday when he came over, I was ready with 100 80-pound bags of concrete mix that I bought on Tuesday. It probably wouldn’t have cost any more to have the local concrete company send a truck out, but with the landscaping changes I made last summer/fall, there really wasn’t any way that the truck could have gotten close enough to pour the footer.

I do have an electric powered concrete mixer that I bought several weeks ago in anticipation of the material that will need mixed. It’s one that Lowes offered, and it’s worked quite well the times we’ve used it. On Wednesday, we set it up near the house (powered by my generator since I had the temporary power disconnected) and began mixing. Two bags fit in it quite well. It took 54 bags to complete the footer for the kitchen.

For the porch pier footers, we moved the mixer so that it set right over each hole. We mixed three bags at a time which is all that would fit in the mixer. It had no problem mixing that amount of material, and the generator never complained. After mixing, we dumped the concrete directly in the hole and moved to the next one.

Everything went very smoothly, and we finished all of the block mortared onto footerconcrete work by the end of the day. We had two bags left over which will be used elsewhere later on.

This week Jon wasn’t able to be here on Monday. So, I worked on my own. On Friday I had purchased some 12” concrete blocks for the porch piers. They didn’t have any surface bonding cement in stock – I’ll need that for surfacing the kitchen crawlspace wall.

I put strings up to make sure that I would have everything lined up properly.  Then, I set out the blocks for the kitchen wall in preparation of first course for kitchenmortaring the first course onto the footer. After that, I mortared each block, making sure it was level.
Once I finished the first course for the kitchen, I measured for the porch piers to make sure they would be properly situated on their footers. While doing this I discovered something interesting in a very good way: the distance from the corner of the porch to the block wall for the kitchen was the same distance as from the rear corner of the porch to the root cellar wall – 33.5 feet. First blocks for porch piers at back of house I was kind of amazed because the way it’s put together, there was no reliable way to ensure that it would be so.

I was able to get all of the first blocks for the porch piers mortared into place and level yesterday. Today, after returning a piece of equipment to a friend, I started stacking blocks. I started with one corner  of the porch. Mortared block pier After stacking the blocks, I decided that I would mortar the blocks together. I was going to dry stack them. I’ll stucco the piers later so they will match the rest of the foundation walls.

By the time I quit this afternoon/evening, I had all of the piers across the front of the house mortared. These are the ones with the most blocks. It shouldn’t take too long to mortar the blocks for the other piers tomorrow. Jon should be here tomorrow, and I’ll have him start dry-stacking 033the blocks for the kitchen.

I hope that the work can go fast and furious from here on. That should make it possible to keep the blog updated much more regularly.


Sunday, July 26, 2009

More work on the crawlspace wall

I didn’t realize it has been over a month since I posted an update. I wish I had completed a lot more work on the house since the last post than I actually have. It’s summer time which is busy with many different projects. I’ve endeavored to work at least one day a week on the house. Other projects have included finishing up classes (with lots of papers to be graded), garden work, and making hay among other things.

The house on 7/24/09The boys and I were able to get all of the blocks around the perimeter set in place. This process really didn’t take too long, but the frequent rains we’ve had make it a muddy job at times. I prefer not to slop in the mud and track it all over. So, I tend to put off some of the house work when it’s muddy around the house (which seems to be quite often this summer). Usually, we’re dry around here at this time of year. The weather this summer is quite different than the usual.

The biggest job involved in laying the blocks around the house was hauling them to the house from where I had them unloaded when they were delivered. They aren’t far away, thankfully, just out of the way. I hauled six or seven at a time in the wheel barrow, and the boys worked together to haul two at a time on a hand truck.

Last Friday, we worked on things again, the first time since earlier in the previous week. front wallsill boltsI had purchased several bags of concrete mix and some j-bolt concrete anchors. I mixed concrete in the wheel barrow, filled voids two courses down from the top every eight feet along the walls, and set the anchors. On both sides of the crawl space access door, I filled the voids all the way to the footer. There were also a couple of gaps in the wall that I filled with concrete – I don’t want any access points for mice and other vermin. I need to buy another dozen j-bolts to set between the ones already in place. These will be used to bolt a cedar sill to the wall. I’ll be harvesting the trees and milling the sill beams soon.

Filled gapblock wall

After lunch Friday, the boys and I started coating the back wall with surface bonding cement. We’re going to coat the entire external surface of the block wall all the way around the house. I don’t know that we will coat the inside surface. I’m thinking that it won’t be necessary. Later if I decide it is, it won’t be too difficult to trowel a coating on it. We coated all the back wall and started on the east wall before quitting. In the right photo below, you can see the east wall. Also, laying on top of the wall are two hawks I quickly made for holding the material while troweling. The hole in the wall which is visible was left for running a sewer line out from under the house if the septic tank needs to be set on the east side of the house (I prefer it on the west side).

coated back wallcoating on side wall

After laying the blocks, I ended up with five different levels on the wall, including the root cellar wall. A little more planning on my part would’ve eliminated most of these. However, I decided that it won’t matter, and it won’t. I’m custom cutting the beams for the sills. So, they’ll set the top of the wall at the right height for framing the porch around the house. The surface bonding cement will cover the seams between wall sections and tie them together. Besides, those under the porch aren’t going to be easily seen.

We had rain yesterday and last night. So, it’s a mucky mess around the house today. There’s more rain in the forecast for the next few days. I hope to be able to finish the coating of the walls this week, but I probably will only work on it if the mud isn’t too bad, meaning it needs to dry out a bit first.

Monday, June 22, 2009

The block-work continues

    It’s been hot and humid the last few days. Yesterday’s temperature was somewhere around 93 degrees, or so I was told. I don’t have a thermometer with which to measure the temperature. I do know that it was hot while I worked – I was drenched with sweat. But, that’s to be expected, and it’s not a problem.

Yesterday morning, I finished mortaring the rest of the blocks for first course of the crawlspace wall. south wall from east endThere was about 80% of the back wall to be completed, and it went pretty well.

After finishing the mortaring, I started laying blocks on the front. After about 50 blocks, it was lunch time and time for a dry shirt. After lunch, I continued laying block along the front of the house. It wasn’t long until my shirt was soaked again. I hauled six blocks at a time in the wheel barrow to the corner of the house and set those before getting another load. Meanwhile, my boys hauled two blocks at a time (working together) to stack them on the east side of the house. That way they’ll be ready when I start laying the blocks on that side and the back of the house.

south wall from west endAbout ten feet from the west end of the front wall, I set an access door in the wall. I bought a 32” x 32” door on Friday. These doors are designed to be installed in a mortared wall in which the heights and widths are figured in multiples of eight inches. When dry stacking concrete blocks, you aren’t working with multiples of eight. The blocks are 7-5/8” tall and 15-5/8” long. So, my 32” x 32” door wouldn’t fit perfectly in a two block wide by four block high space.

access doorIt wasn’t a problem though. Because I am laying the blocks on each of the four levels independent of the other levels, it wasn’t a problem to bring the front wall from the east side to the door and then start the next section from the door to the west end. Height wise I wasn’t concerned, because I planned on using the sill for the top of it.

I mortared two four inch high solid concrete blocks onto the first course of blocks where I wanted to put the access door. Using a masonry blade in my circular saw, I cut into the ends of two blocks for the bottom plate of the door frame. It’s made to be mortared between courses which wasn’t going to work for me anyway. Once I set it up four inches on the solid blocks, it also put the bottom plate in the middle of the next course of blocks. It fits nicely in the cuts on the blocks, and they help hold it securely.

The top of the door frame is two inches below the top of the block wall. Once I place the sill on top of the wall, I’ll attach a two inch piece to it above the frame. I’ll also come back and caulk the seams around the frame from the inside to make it tight and secure. I don’t want air gaps around it.

The wall along the front came out acceptably well. It looks good with it there. It’s really nice to see progress on the house, but it sure is a lot of work. I’ve got to get the other walls blocked and then coat all of them. I’ll probably soak a few more shirts before I’m done.

House with front crawlspace wall

Thursday, June 18, 2009

Blocking in the crawl space

We’ve had plenty of rain so far this year. The garden has not suffered from dryness. In between rain showers and storms and all the other work there is to be done around here, I have continued to work on the house. I laid out blocks on the footer last week, figuring where the crawlspace walls need to be in relation the house frame.

011Earlier this week, after some rain and before some other rain, I started mortaring the first course of blocks on the west side of the house for the wall that will be under the mudroom. The first step in the process was to remove some of the accumulated mud that had been deposited around the blocks by the rain. Then, I lifted out the block that was to be mortared into place, and placed some mortar where the block had been.

012After distributing the mortar where the bottom edge of the block would set on it, I placed the block back into position. The main purpose for the mortar is to get the first course of blocks level. So, after placing the block on the mortar, I used a piece of wood to get it into place and then checked its placement with a level. I endeavored to make sure that each block was level side-to-side and along the line with the other blocks.

016015

It takes a while to mortar the first course of blocks into place. I was able to complete the ones on the level that will be beneath the mudroom.  It then rained off and on during the next couple of days, and I managed to work on some other things that needed done.

018

I was able to return to the project yesterday afternoon after spending the morning working on my class (I teach a class online for a university). I started by mortaring the blocks along the next level of the footer on the west side of the house. This is a shorter run than the previous level, and it went fairly quickly.

After getting these blocks mortared into level, I began laying blocks. One thing about dry stack concrete block construction is that the block-laying goes quickly. I had to haul the blocks from where I had the block company put them a few weeks ago which is maybe 20 yards away and down hill from the house. I moved six at a time using a wheel barrow. That seemed to work better than using a hand truck.

I began laying blocks for the walls under the mudroom since that mortar was fully set up and cured. After completing laying those, I went ahead and laid the ones on the section I had just mortared. I figured that the mortar wasn’t going to settle or move with the weight of the blocks anyway.

Because of the way I designed and poured the footer, there are four levels for the blocks around the house. I did not worry about making the steps for each level perfect with the other levels so that the blocks could 026be laid seamlessly all the way around the house. Each level can be constructed as a separate wall. Any gaps that may exist between levels will be filled with concrete. Then, the whole thing will be coated with surface bonding cement. I will cut cedars for the sill on top of the wall, so any variation in height will be accounted for in the dimensions to which I cut them. This simplified the figuring and block laying for me.

I saw a block wall a couple days ago for which the footer appeared to have been poured on an angle matching the slope of the house site. The blocks appeared to have been cut along the bottom so that the top would be level. I didn’t want to do that much cutting. I think my method will work all right.

025In anticipation of plumbing that I’ll do later, I cut a hole in one block before laying it. This hole will allow me to run the sewer pipe to the septic tank through the wall. I am not completely sure where the septic tank will go at this point. So, I’ll cut another hole on the opposite side of the house, too, just in case I need to place it on that side. I knew I didn’t want to cut a hole later.

022As can be seen in the photo to the left, I didn’t lay out the end wall on the cellar exactly right. It doesn’t line up straight with the crawlspace wall I just laid. I can’t change it, of course, and it really won’t create much problem. I expect that it won’t be very noticeable later anyway.

A thunder storm rolled through just after I started writing this post. I was planning on working on the front crawlspace wall this afternoon. It may be too muddy now. I’ll see in a little while.


      021  024033

Monday, May 11, 2009

Root cellar: surface bonding cement

We’ve had more than five inches of rain during the last nine days. In between some of the showers and storm, I’ve been able to work some on the root cellar. The frequent rain has been frustrating in that it’s kept me from getting things done like I want to, but that’s the way it goes.

The blocks are all stacked for the walls. I was able to fill 12 cores in the walls last week when we had a mostly rain-free day. I filled six more cores yesterday, all that will be filled. Last Thursday I was able to apply the surface bonding cement to the outside wall toward the hill on the back of the root cellar. That night we received some very heavy rain (over an inch and a half of it) which caused some mud to break free on the back wall of the excavation. Not too much, but I was glad to have the wall done on that side.

Today, I installed the PVC through the end walls to which I will connect the fresh-air vents for the cellar. I used concrete and mortar tooutside walls are done fix them in the wall and cover the holes around the edges.

Then, I finished parging the rest of the outside walls. It was muddy down in the hole around the outside of the cellar walls. The dirt is mostly clay and sticks to my boots like crazy. I wore my muck boots since they can be cleaned off fairly easily.

After finishing the outside walls, I changed shoes and began on the inside. I was able to parge one inside wall, an end one. I hope to finish the other three walls tomorrow.

first inside wall pargedI mixed the surface bonding cement in a wheel barrow today, using a garden hoe. It worked fairly well. Previously, I mixed it half a bag at a time in a five-gallon bucket using a paddle mixer with an electric drill. That method actually worked better, but my mixer needs repaired. So, I didn’t use it today.

The key is getting the right amount of water in the mix. If it’s too wet, it’ll slump off of the wall. If it’s too dry, it takes a lot more effort to trowel it on the wall. When it’s mixed just right, it trowels on smoothly and stays where it’s supposed to. It’s been a trial-and-error process getting the mix figured out.

Surface bonded concrete block walls look nice, I think. Better than regular, mortared block walls. It’ll be nice to see them all complete. At that point, I’ll start backfilling.   muddy boots

Thursday, February 12, 2009

Skidding cedar logs (future porch posts)

Because it was another nice day here in South-Central Kentucky, I skidded the cedar logs I cut earlier in the week out of the woods. My dad helped, which I appreciate a lot. Feb    12th 013We started with three logs which were far up the hill. I actually had cut these trees last winter. They’d blown down in a storm previously. I had limbed them and left them long, 16 to 20 feet.

Even though they were at the top not far from the old county road, it was easier to skid them out from the bottom of the hill. I can drive the tractor in a couple of hundred feet which was at the bottom bellow the trees. They were still over 100 feet up the hill. Feb    12th 015We used a couple of ropes to reach them and pull them down the hill. They pulled out fine, meaning they didn’t get caught up on stuff and needs extra coaxing. For one, we had to use a snatch block to redirect the direction of pull. I have a couple blocks that are part of the two block and tackle sets I bought prior to the frame raising.

After lunch, we skidded out the five cedar logs I had bucked into 9 foot lengths earlier in the week. These didn’t lay too far from the bottom of the hill, and we were able to physically pull them to the bottom where we could get a choke chain around them and pull them out of the woods. This went much more quickly than snaking logs down from the top of the hill.

Feb    12th 011Feb    12th 017 

We skidded the logs and laid them out where I’ll mill them into 6x6 posts with my Procut Mobile Sawmill later. I had two cedars Feb    12th 021I cut several years ago which we also skidded to the pile. Each of these was long enough to make two posts. So, in the pile, we now have enough cedars for 17 of the 20 posts.

We then went in search of another cedar tree that might yield three more posts and which would be easily accessible. We have many cedars on the property, some of them very nicely sized. We didn’t find one that was tall enough for three posts where we looked on the other side of the ridge, but there are several that would yield two posts.

I cut one down, having picked where I wanted it to fall and where I thought it would naturally go. However, it didn’t go where I thought it would. It was evident while making the back cut that it was beginning to lean the opposite direction. I guess I read it wrong, but it sure didn’t look like it would fall that way. Feb    12th 025It ended up falling about 90 degrees from where I planned for it. This was fine, except for how cedars so easily get hung up in other trees. This one did, leaving it leaning at about a 35 degree angle.

I limbed what I could off of it and then measured and cut the lower nine feet off for a post. This allowed the tree to settle down a bit more. So, I was able to limb the next section and cut it off. I’ll pull the rest of the top out later after skidding the logs. It was getting near chore time, and we still needed to put the tractor and tools away. So, we called it quits. I’ll cut another tree for the 20th post and skid them out of the woods later. (I wasn’t wearing my chainsaw helmet because I hadn’t brought it. I had the chainsaw just in case it was needed when skidding, not expecting to do any real sawing.)

089 085

Friday, March 14, 2008

The digging continues . . .

Yesterday was a beautiful day with temperatures in the mid-70s. So, I had some more shovel work to do.

Before I began on digging for the block wall footer, I had six fruit trees to put in the ground. We ordered several fruit trees from Adams County Nursery along with four other families, because, if you order 25 or more trees, the price per tree is basically cut in half. As it ended up, the price for each tree averaged right at $12. And, these are nice trees, too. We ordered several from them two years ago and will order some more this fall for next spring.

I used the post hole digger to help dig the holes for the fruit trees. While I had the tractor running, I went ahead and dug a series of holes along the east side of the house to help with digging for the footer on that side, as it was to be the next side to be completed. After getting the trees all set, I started digging. In the photo you can see my older son helping out. He and his younger brother have helped with the digging and moving dirt from the trench. The concept of digging is one that they seem to love, but when it comes to it being a form of work, they have a much more difficult time. I had already dug out the trench around the corner at the time I took the picture.

I had several sore muscles from my digging the day before, but I figured the soreness would work itself out as I continued with what needed to be done. So, I dug for several hours. It's a slow process when you have to move tons of dirt a shovel-full at a time, but it does get the job done. By the end of the day, I had completed the east side and along the front of the house. I still have sore muscles today, but that just goes along with such work.

About ten feet from the front of the house, I stepped the depth of trench down eight inches. The house is on a slightly sloping site, and I dug the trench along the back as deep as I reasonably could (about 30 inches or so). I want to keep the footer deep enough along the sides and front, and that requires that I make them at least one block deeper there.

As I've been digging, I've decided against a rubble trench with a drain. The ground here drains very well -- there was no moisture below the first few inches, and we've had enough rain recently that if there was a problem with drainage it should've been apparent. So, I'll just pour a footer along the bottom of the trench to lay the concrete blocks on.

As I contemplate digging the root cellar and terracing the hill behind the house, I'm wishing for a backhoe. I may see about hiring some of this work done. Although it will cost money, it will also save some time and a lot of work.

Wednesday, March 12, 2008

Using a "misery spoon"

I finished the trim on the front of the cupola this morning. That didn't take long. So, I started on the next part of the project: digging a trench around the frame.

It was afternoon before I started digging. I drove to my friend Gill's house this morning to borrow his pto-powered post hole digger. I used it when digging for the pier footings two years ago. With the 12" auger, it helps to loosen the soil, making the digging easier. So, I borrowed it to use it for this part of the foundation.

I started on the back of the house. This will be the deepest trench because there is a slope toward the front. The only problem was that I couldn't get the tractor behind the house to use the auger except on the ends. The hill that rises just behind the house was too steep for me to comfortably maneuver the tractor and auger into position. I had to accept being able to drill three holes on each end.

I worked for about 3 hours with the shovel, a tool that someone once called a "misery spoon" for good reason. I'm sure I'll be sore tomorrow. I expect I'll work out some of the soreness while digging. The trench for the footer that will be under the concrete block wall I'm putting there must go all the way around the house.

The foundation for this will will employ a rubble trench. I'm going to put rock and a perforated pipe for a drain in the bottom of the trench, and then more rock. On top of the rock I will pour a rebar reinforced concrete bond beam six or eight inches thick. Upon this I will lay concrete blocks to the desired height. This concrete wall will help support the straw bale walls and the inner side of the wrap around porch.

In addition to the trench, I'm going to dig for a root cellar. This will be located under the pantry and mudroom. Then, I need to terrace the hill behind the house before I can frame the porch because the hill is in the way. Originally, there wasn't going to be a porch on the back, but there is now, and I've got to move some of that hill. It can be done with a shovel, one scoop at a time.

More digging to do tomorrow, and the next nice day, and the next, and . . .