Introduction

The 57 acres that comprise Cedar Ridge Farm are located in the beautiful rolling hills of South Central Kentucky. My wife, our four children, and I are on a homesteading adventure as we work toward increased self-sufficiency. We grow much of our own food and enjoy being in touch with the agrarian roots of our lives.

One of the major projects we have undertaken is the building of our own home. The house we're building has three major distinguishing features: 1. we're building it without incurring any debt; 2. it is a timber frame structure; and 3. the exterior walls will be plastered straw bales. We live debt and mortgage free, and building our house with that approach makes perfect sense. Large timbers in a home possess a beauty and project a sense of strength, stability, and warmth that we want in our home. Straw bale walls provide insulation and make ecological sense. This blog is a record of our home-building project.
Showing posts with label wall framing. Show all posts

Thursday, May 26, 2011

Slip straw in more interior walls

We had some friends over on the first day of the week for a straw stuffing party. The previous week I bought two sheets of 3/4” plywood for another two sets of forms. I also mixed up about 60 gallons of clay slip in preparation.

We started on the wall between the living room and master bedroom next to the two sections the boys and I did earlier. We also worked on the wall beneath the stairway, the other interior wall in the master bedroom, and a couple of bathroom walls. By the end of the day, we’d completed most of the walls that we’d started.

On the next day, the boys and I were able to finish all of the walls that we’d started during the work party. Then on Tuesday afternoon, our whole family worked on one wall upstairs. Then, yesterday afternoon, we worked on another wall upstairs. We ought to be able to complete the rest of the walls in that bedroom and storage area (on the east end of the house) in another afternoon’s worth of work. I’ll share photos of our progress upstairs later.

019021024025028

Sunday, April 24, 2011

Light clay straw infill, a.k.a. slip straw

008

The plan for our interior walls is to pack them with straw coated with clay slip which will then be plastered. This method is referred to as light clay straw infill or as slip straw.

The process involves mixing clay slip which is a clay-water solution about the consistency of heavy cream. The clay slip is then used to coat loose straw, kind of like putting salad dressing on salad. The straw doesn’t need to be soaked, just coated with the clay slip.

Packing the clay-straw mix into the walls involves the use of moveable forms. I have some 1/2 inch plywood cut into 24” by 48” pieces. Two of these are screwed onto opposite sides of the wall, creating a cavity into which the clay-straw can be packed. The clay-straw is put between the forms and then tamped firm. We use some 1”x1” boards for tamping.

Once the cavity has been packed to the top of the plywood forms, two more forms are added above the first ones. The new cavity is then packed full of the clay-straw mix in the same way. When it is packed full, the first two forms are removed and placed on the wall above the second set of forms. The process of packing and piggy-backing forms continues until you reach the top of the wall.

The boys and I tried out this method late last summer on one wall in the house, and I was impressed with how well it worked. I learned about the technique by reading about it and watching a couple of videos on YouTube. Using slip straw will allow me to plaster the interior walls like the exterior straw bale walls. It will provide some sound insulation between rooms, and it means I don’t have to use drywall. That, and it is inexpensive, using straw left over from building the exterior walls and clay I dug out of the ground.

Today, the boys and I decided to pack a wall, if we could. 007We were able to infill two cavities between studs on one wall which is 9.5 feet high.

The photo on the right shows our progress at lunch time. We had finished filling nearly to the top of the wall and had removed the lower forms. Because there wasn’t enough space above, we couldn’t just piggy-back the lower forms above the others. I actually removed all the forms, secured ones near the top of the wall, and then put the others directly below these. Adding the forms below helped to assure that we didn’t push any of the material out of the wall when tamping it firm.

You might notice that there are boards attached to the plywood. I bought 1/2” plywood for the forms, but it is really not thick and rigid enough – it will bow out some when the clay-straw is tamped in firmly. I screwed some 1”x2” boards to them to provide more rigidity. Thicker forms would also work, of course.

One of the challenges is what to do when you reach the top of the wall. The top plate of the wall and the ceiling are in the way for feeding in more clay-straw mix015 and are in the way for tamping it into place between the forms. The solution that we tried out today was to put a form on one side all the way to the top of the wall while leaving the one on the other side several inches lower. Then, into the space we packed some heavy clay-straw mix – basically a cob. This mix sticks together better in this application and will stay in place better than the light clay straw mix. 012This solution seemed to work well, as long as there’s no problem with it drying properly.

We learned some lessons from today’s activity. One is to put the straw in to be packed in small quantities rather than a lot at a time. The smaller amount will be more evenly packed within the wall. Larger amounts tend to not get packed all the way and leave voids in the wall. The voids on the surface of the wall are the only ones that are visible, and they will be filled with plaster later on. So, it’s probably not that big of a deal, but it is nice to get the material packed in firmly, though.

Another lesson is to pay particular attention when starting to fill between a new set of forms. For some reason it is at this point that the most visible voids and loose packing seems to occur. It might be that we would start with too much straw, but I’m not sure. I just know that we need to take a little extra time and pay a bit more attention to the filling and packing at this point in the process.

A third lesson is to be careful around electrical wires in the wall. I ran the wires for the outlets in this wall about 12” from the floor. My crewThe straw has to be packed on either side of the wire, but it’s quite easy to hit it with the tamping stick. It might have been better to have routed the wire along the bottom of the wall to eliminate this minor hassle. I thought that it would be less of an issue than it was today and that it would also help to hold the clay-straw in the wall.

We are happy with what we accomplished today. It will take it a few days to dry. As long as the weather is not too cold or too humid, it ought to dry well. We’ll be keeping an eye on it.

Monday, March 28, 2011

Interior wall framing is finished

Yesterday and today I worked on framing the last walls that needed done inside the house. These included the interior wall on one upstairs bedroom, the walls for both storage rooms, and framing for the upstairs closets and the linen closet.

I bought several 2x10s a couple of weeks ago and a few 2x4s. My guy didn’t have many 2x4s. I figured that if I ripped a 2x4 out of a 2x10 the board left over along with an unripped 2x10 would make 15” shelves in the pantry. It works out that way, too. No, I haven’t built pantry shelves, but after ripping out the first 2x4 I measured the leftover and an uncut 2x10.

My only problem is that I didn’t buy enough 2x10s. I needed more 2x4s than I thought. 028So, I’ll have to get some more to have enough for all of the pantry shelves.

Yesterday, I framed the interior wall for the west upstairs bedroom. It didn’t take too long, and I didn’t have too much problem fitting it in place.

I was also able to frame the wall for the storage room in the east upstairs bedroom. I actually did it in two pieces, leaving the door way in the middle. 014As sometimes happens, I had to take it out after putting it in to move it. I don’t always see exactly how things need to be done to get it right the first time, but I do try.

Today, I put in the wall for the other storage room which is in the other bedroom. 023This one went faster since I’d already figured out what to do on the other one.

After getting this wall in place, I began on the upstairs closets. We’re going to use curtains rather than doors on them. 008So, the design is just to run a wall out straight from the window. This sets the window on the north side of each bedroom back a little, kind of like a dormer. It makes for two nice closets in each upstairs bedroom, too. The closet walls are only as high as the beam above the002 front of them. This leaves a ventilation space between the top of the closet wall and the ceiling.

The last walls to frame today were for the linen closet which is downstairs near the main bathroom. It is about 14 inches deep – it’s located at the end of the bathtub and is accessible from the hallway at the bottom of the stairs. There’s also a cabinet framed into the wall above the closet. When the children came down this afternoon, they had to climb into the upper cabinet.

After finishing all the framing, I swept all the floors in the house (except the laundry room). My next task is to get the rest of the electrical boxes installed and run some wires.

Wednesday, February 9, 2011

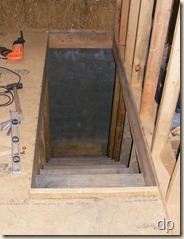
How to build stairs (to the root cellar)

Although I haven’t gotten any more 2x4s yet, I had just enough left to frame the root cellar walls. I’d set some treated 2x4s aside for this purpose, otherwise I’m sure I would’ve used them elsewhere in the house.

Before framing the cellar walls, I cut the stringers for the stairs into the root cellar. I thought it might be helpful to someone if 008I shared the process I used for building the stairs. This is the same method I used for the main stairs in the house (photo at the right).

The first thing to do is to figure out the total rise and run for the stairs. For the root cellar, the distance from the concrete floor to the floor above (the first floor of the house in this case) is 90 inches. The root cellar is 96 inches across, but there was extra space above the inner wall of the root cellar, about 12” long and 9 inches to the sill board on the block wall. I wanted to use this for a step, thereby shortening the total length of the stairs. With the total rise and run, I could figure the specific measurement for each step.

The main stairs I built have a 7-1/4” rise and 11” run, which make very comfortable stairs. I knew that I couldn’t build the root cellar stairs to the dimensions. I did not want steps that are too steep – I’ll be using them to haul vegetables/food in and out of the root cellar. I’ve been on some too steep, too narrow, feel-like-you’re-gonna-fall steps before, and I knew I didn’t want that.

I figured if I made the steps have a rise of nine inches, meaning there would be a step up of nine inches for each step, that would come out even (9” x 10 = 90”). In order to figure the run for each step, I computed the total length of the stairs for three different lengths: 9”, 10”, and 11”. With the extra space for a step outside of the root cellar at the top and having a small platform for the bottom step instead of going all the way to the floor, I decided on a 10 inch run for each step. That would be enough space for a foot to comfortably fit.

It was easy to figure the total number of steps I would have to cut into the stringers. The first step would be outside of the root cellar. So the second step would be the first one on the stringers and would be 18 inches below the first floor level, and the stringer would have eight steps (of the ten steps needed, the first one was outside the cellar and the last one was the cellar floor).

The only other consideration was the thickness of the treads and risers. I was using 2x material which is 1.5” thick. 002That means for the bottom step, I had to subtract 1.5 inches for the rise to be 9 inches when the tread was put on. And, since I was going to use the cellar wall for the riser on the top step against the wall, I would need to cut it 1.5 inches shorter than the others.

With my figures, I began to lay out the steps. I used a framing square (a handy tool) on which 005I clearly marked with pencil the 9” and 10” lines on both sides along the outside edges. By positioning the square on the 2x12 which was to become the stringer with the 9” and 10” marks on the edge, I used a pencil to mark the first step. After the first step, I moved the square so that the 9” mark was at the point where the 10” mark had been which moved the 10” mark further down the edge of the board. 008I drew the shape and then continued for the rest of the steps.

Once the lines were all drawn using the square, I measured the height for the bottom step and the length for the top step (you can keep the height and lengths of the steps straight with the measurements you’ve now transferred to the board – 9 inches and 10 inches). With everything marked, I could begin cutting.

I used my circular saw to cut along the lines, watching carefully so that I didn’t cut beyond the corner – 013a round blade will only cut all the way to the corner on the top side. So, once I cut all of them with the circular saw, I finished the cuts with a hand saw. 014If there was any unevenness left in the cuts, I cleaned it up with a chisel.

Now, I had my first stringer. I could mark the second one the same way, but I opted to use the first one as the template for the second one. I laid it on top, keeping the edges aligned, and marked the treads onto the other 2x12. Then, I cut it the same way as the first one.

The only other materials necessary for the steps were the treads and risers. I had a 2x10 which I cut into 30” lengths for the risers (30” is the width I’d previously decided on for the stairs when framing the floor above the root cellar). They were about 1/4” too wide, so I ripped off the extra on the table saw. For the treads, I used 30” lengths of 2x12s. I did not rip their 11.25” width, leaving 1.25” to hang over on each step.

Before I put the stairs in, I built two short walls to go on either side of the stairs in the root cellar. I nailed them together in the house and then lowered them down into the root cellar. 023I convinced them into position (they fit snugly) and secured them with nails into the floor joists at the top and concrete screws into the floor and wall of the root cellar.

With the walls in place, I situated the stringers and nailed them to the wall studs. Then, it was a matter of nailing on the risers and the treads. I had to figure out and build the top step on its own (no riser) and extend the bottom step for a short platform.

The length of the walls provides for 30 inch openings at either side of the steps at the bottom. The right section of the root cellar will be the larger of the two rooms. We haven’t decided exactly how we will store things, but given time we will. If the smaller room on the left can be kept a little warmer, it would be a nice place for storing sweet potatoes, onions, garlic, winter squash – the things that like it a little bit warmer and not too damp.
019030

Friday, February 4, 2011

I need more 2x4s

I’ve worked on the house the last couple of days, but I didn’t take my camera with me to take any pictures. I don’t like posting without photos for some reason.

All of the downstairs walls are now framed with the exception of the framing for a linen closet at the bottom of the stairs. The last two walls I framed were for the pantry and the main bathroom.

One of the intentions for the downstairs is for it to be wheel chair accessible. All of the exterior doors are 36” doors and the interior doors downstairs except for the pantry and master bathroom will be 36” doors, too. The master bathroom is really too small to be accessible, anyway. The main bathroom will have enough floor space inside to make it accessible. We don’t want the door to swing out into the hallway (opening inside limits the usable floor space). So, our solution is to make a double door.

I think I’ll make the interior doors for the house. Something simple, yet nice. That will allow me to make whatever will work best in the specific places. 005Some doorways, like for the closets, will not have doors. They will have curtains, instead.

With the downstairs walls framed, I put a 4x6 floor joist in place for the extra upstairs landing space. This joist will be visible from inside the main bathroom. So, I wanted it to be the same as the other visible floor joists.

Then, I framed a wall upstairs. I started with the wall at the top of the stairs first. Somehow, when I measure for a wall, plan it out, cut the pieces, and 001put it all together, the wall tends to end up being 1/4” too tall. This wall took some persuading to get it under the beam connecting the rafters. But, it’s in there, and it won’t be coming out.

This morning013 I framed the small section of wall on the other side of the post from the other upstairs wall. This went easily and quickly. I figured the angles, measured for the bottom plate, cut it, and put it in. Then I was able to mark the other two 2x4s for length, cut them, and put them in. For the individual studs, I measured the needed length, cut them, and put them in one at a time. I figured it would be easier than building the wall on the floor and trying to set it in place because of the angles involved.

There are still several upstairs walls to be framed and two walls in the root cellar, but I’ve pretty much exhausted my 2x4 supply. There has been very little waste from the ones I’ve used, but I only have a few left, not enough to finish the walls. So, I'll be getting some more soon, hopefully early next week, so I can finish the wall framing. I have wiring to get started on. So, if I don’t get 2x4s right way, there is still something I can do.

018

Tuesday, February 1, 2011

More stairs and wall framing

On Sunday I cleaned all of the loose straw and bales of straw out of the house. There was quite a pile of loose straw in the living room. It’ll be used in the interior walls later, but for now I wanted it out of the way. I moved it onto the porch and then tossed it into my hay baler which I brought over from the barn. I figured it would be easier to move and store it if it was baled. There were about 15 bales worth of straw in the pile.

With the straw all moved to the barn, I spent Monday sweeping the floors. I started upstairs with a leaf blower. That made quite a cloud of dust! After I’d blown everything to the downstairs, I set the ladder up and opened the cupola windows. I already had several windows open on the first floor. As soon as I opened the windows in the cupola, dust began flowing upward and out.011 I was encouraged that the cupola will help with ventilation in the house. This is the first time I’ve had opportunity to test it so far.

Today, I wanted to finish the stairs. There were still three steps to build to take the staircase all of the way to the second floor. I started by putting 2x8s down for the subfloor on the stair landing after cutting rabbets along the edges. These boards will be the ceiling in the master bedroom closet also.

Cutting out the stringers for the last steps was simple enough. Once I had them cut out, I had to figure out how to attach them at the second floor level. One side only required putting a board against an already framed wall to put the stringer in the right position. I had to frame a short wall on the other side.

It was necessary to frame the third wall for the master bathroom. This wall is also one of the walls for the main bathroom. 007I left out two studs so that I will be able to put in the tub/shower unit when I’m ready for it. It won’t fit through the framed door opening. Once the tub is in place, it will be easy enough to insert the two wall studs in their proper places.

The final task for today was to frame and put into place the wall against the stairs. This wall will support an extra three feet wide section of second floor landing and serves as one of the walls for the main bathroom. It was simple to frame and fairly easy to put into place.

I swept up some dust created by todays activities and took a few photos before calling it a day. It’s still exciting to see the progress each day I work on the house.

003016

Friday, January 28, 2011

Stairs

019Anne and I spent some time in the house this morning before I milked the cows. She wanted to see what I got done yesterday. Her appreciation of my work is a wonderful thing. She loves the house and is excited about the progress. The children are also excited, and we’re all looking forward to living in it.

Today’s task was stair-building. I started by laying out the steps on a 14 foot 2x12. The main tool for laying out stairs is a framing square. I put one leg on the edge of the 2x12 at 7.25” and the other leg at 11” and then drew lines along the edge of the square. I repeated this eleven times. Then, it was time to cut out the triangles, creating a stringer for the stairway. I cut with my circular saw up to the point the two lines met and finished the cuts with a hand saw. I used the first stringer to mark the second one and then cut it out the same way.

I attached the top of the stringers to the landing at the top and to the floor at the bottom end. The stairs are to be 36 inches wide from the post at the bottom to the wall that will be on the other side of them. However, there will be a wall below the stairs on the living room side, and this wall is at the midpoint of the post. 005So, the stairs are actually 41.5 inches wide up to the landing. The 5.5 inches extra on the living room side isn’t really usable except for being a place to put a railing, but it leaves a full 36 inches of usable stair width.

By lunch time, I had the stringers up and secured and put on the risers. Because the rise of the stairs is 7.25 inches, a standard 2x8 was a perfect width for the risers (a 2x8 is 1.5” x 7.25”).

After lunch I worked for a couple of more hours and was able to cut and install the treads. I used 2x12s. I did have to rip about 1/4 of an inch off of each of them so that they would be the right width. 008One of the treads had to be notched to fit around the post at the bottom of the stairs. I cut the lines with my circular saw, finishing them with a hand saw.

I went ahead and installed seven 2x4s under the edge of the living room side of the stairs to frame the wall that is to be there. These help to support the 016stairs just as the wall on the other side between the stairs and the bathroom will do.

With the walls I framed yesterday and the stairs today, it’s easier to visualize some of the spaces in the house. One of these is the closet in the master bedroom. 022It will be quite nice, nicer than we previously imagined. The photo on the right looks into the closet area. There will be a hanging rod on the right side and a shorter one straight back beneath the stairs.

It’s nice to be able to get back to work on the house and see it coming together as it is.

Thursday, January 27, 2011

Some interior walls framed

Last week I sketched out a wiring plan for our house on a copy of the floor plan I printed out. We aren’t concerned about inspections since our electricity will be completely off-grid, powered by our solar electric system. Not that inspections are a horrible thing, mind you, it’s just that I don’t feel the need to conform to unnecessary regulation and interference. I’ll be doing the wiring myself and will assure that it’s safe, of course.

With the wiring plan laid out, I calculated the number of electrical boxes, outlets, and switches we’ll need and purchased those late in the week. Early this week, I bought some 2x4s for framing interior walls. I also bought some 2x12s for building stairs.

I refigured my stair design and began laying it out on the floor in the house. In order to optimally use the space in the house, we’ve planned the closet in the master bedroom to be underneath the stairs. The stairs will rise 12 steps to a landing where they will turn to the left and continue up four more steps to the second floor. The main part of the closet is to be under the landing. It’s high enough that I won’t bump my head.

With my plans refigured and physically sketched out on the floor, I started framing some interior walls. The first wall I tackled is the one between the master bedroom and the living room. With a couple of hours before chore time yesterday afternoon, I designed the wall, drew it out on paper, figured the lengths of 2x4 I needed, cut the 2x4s to the specified lengths, and nailed it all together.

Having gotten the 2x4s from the local salvage guy, they were in various lengths. I had three 20 footers, several 16 footers, 14 footers, 12 footers, 10 footers, and some 8 footers. With a list of the specific lengths I needed for the wall, I was able to figure out the best way to use the material for the least amount of waste. I don’t like wasting material.

Once the wall was assembled on the floor, I stood it up into place. The top of this particular wall had to fit 008between two of the 4x6 floor joists which necessitated putting the top of the wall in place first. Once I had the top close to where it needed to be, I was able to drive the bottom into place. After getting it plumb, I nailed the wall into place.

This morning, I started on the other interior wall of the master bedroom. Anne and I discussed 011the location of the doors for the closet and the bathroom which are to be on this wall. Once we had these finalized, I could layout the wall and put it together. Perhaps the most challenging thing about this wall was the two angle braces of the timber frame that it had to fit against, although it really wasn’t a problem.

This afternoon I framed a couple of short walls for the closet. These walls are necessary to 014support the landing for the stairs. I also framed the stair landing and put it in place.  This will make it possible to begin framing the stairs soon. There are a few other walls in the stair area that also need to be framed. They’ll create the other bathroom, enclose the space under the stairs, and support some additional floor upstairs at the top of the stairs.

021I mentioned in a previous post that I intended to cut a door in the pantry floor to allow access to the crawl space from inside the house. 023Since I wanted to put a brace under a couple of floor joists in the area under the bathrooms (the floor wasn’t quite level in this area because of variation in the 4x6 floor joists in the timber frame), I decided it was a good time to cut the access. The alternative would’ve involved getting muddy to go through the other access door in the block wall.

I’m quite pleased with the door I cut in the floor. I think it will work quite well. There is enough space between the floor joists for accessing the crawl space easily. I’ll make a couple of steps down into the crawl space later on.
